
Smoking & Curing
Smoking, Curing & PreservingWild Salmon at Home
Cold-smoked, hot-smoked, cured — three traditions from a fishing family, with recipes you can run at home.
Key Takeaways
- Hot smoking cooks salmon at 225°F with wood smoke, producing flaky, shelf-stable fillets in 1–3 hours — the most approachable method for beginners.
- Gravlax requires only salt, sugar, and dill: no special equipment, no heat, and the results rival any Scandinavian deli in 48–72 hours.
- Cold smoking creates silky, lox-style salmon but demands strict food safety protocols — a proper salt cure is non-negotiable before smoking below 80°F.
- Salmon jerky carries the legacy of Alaska Native preservation traditions and is one of the highest-protein, lowest-weight trail foods you can make.
- Wild salmon is ideal for every preservation method: its firm texture, clean flavor, and high omega-3 content hold up beautifully through brining, curing, and smoking.
- Each species of Pacific salmon has a preservation method where it excels — this guide matches every species to its best technique.
In This Guide
1. Introduction to Preserving Wild Salmon
An Ancient Tradition, a Modern Craft
Long before refrigeration, long before commercial fishing, the indigenous peoples of the Pacific Northwest and Alaska were masters of salmon preservation. For thousands of years, communities along the Yukon, Copper, and Nushagak rivers transformed the seasonal abundance of wild salmon into a year-round food supply — drying fish on racks in the summer wind, smoking it over alder fires, burying it in salt caches against the winter. Preservation was not a hobby. It was survival.
Today, these same techniques have evolved into a thriving home craft. Hot smoking, cold smoking, gravlax, jerky, and canning allow anyone with fresh wild salmon to create preserved foods that rival (and often surpass) anything you can buy in a specialty store. The satisfaction of pulling a rack of mahogany-glazed smoked sockeye from your own smoker, or slicing paper-thin gravlax you cured in your refrigerator, is hard to overstate.
Why Wild Salmon Is Ideal for Preservation
Not all salmon is created equal when it comes to curing and smoking. Wild Pacific salmon has several qualities that make it the preferred choice for every preservation method:
- Firm, dense flesh. Wild salmon swim thousands of miles through open ocean. That exercise builds firm muscle tissue that holds its structure through brining, smoking, and drying — while farmed salmon, raised in confined pens, tends to be softer and more prone to falling apart during processing.
- Clean, natural flavor. Wild salmon’s diet of krill, shrimp, and small fish gives it a complex natural flavor that shines through curing and smoke. There are no off-flavors to mask.
- Higher omega-3 content. Wild salmon’s natural omega-3 fatty acids actually help the preservation process by keeping the flesh moist during smoking and contributing to that rich, buttery mouthfeel in cured preparations like gravlax.
- Natural color. The deep red and orange hues of wild sockeye and king salmon come from natural astaxanthin in their diet. This color remains vibrant through smoking and curing, creating finished products that look as spectacular as they taste.
- Species variety. Five species of Pacific salmon, each with different fat content and texture, means there is a perfect species match for every preservation method.
Five Species, Five Preservation Strengths
One of the great advantages of working with wild Pacific salmon is the range of species available. Each has characteristics that make it particularly suited to certain preservation methods:
| Species | Fat Content | Texture | Best Preservation Use |
|---|---|---|---|
| King (Chinook) | Highest (rich, buttery) | Large flakes, silky | Hot smoking, gravlax, cold smoking |
| Sockeye (Red) | High | Dense, firm, fine flake | Cold smoking, gravlax, hot smoking |
| Coho (Silver) | Medium | Medium flake, delicate | Gravlax, citrus cures, light smoke |
| Pink (Humpy) | Low | Soft, fine flake | Jerky, canning, heavy marinades |
| Keta (Chum) | Low-medium | Firm, meaty | Jerky, canning, traditional dry fish |
The general rule: higher-fat species (king, sockeye) excel in smoking and curing where the fat keeps the flesh moist and carries flavor. Leaner species (pink, keta) are ideal for jerky and canning where you want a drier, firmer finished product.
2. Hot Smoking Wild Salmon
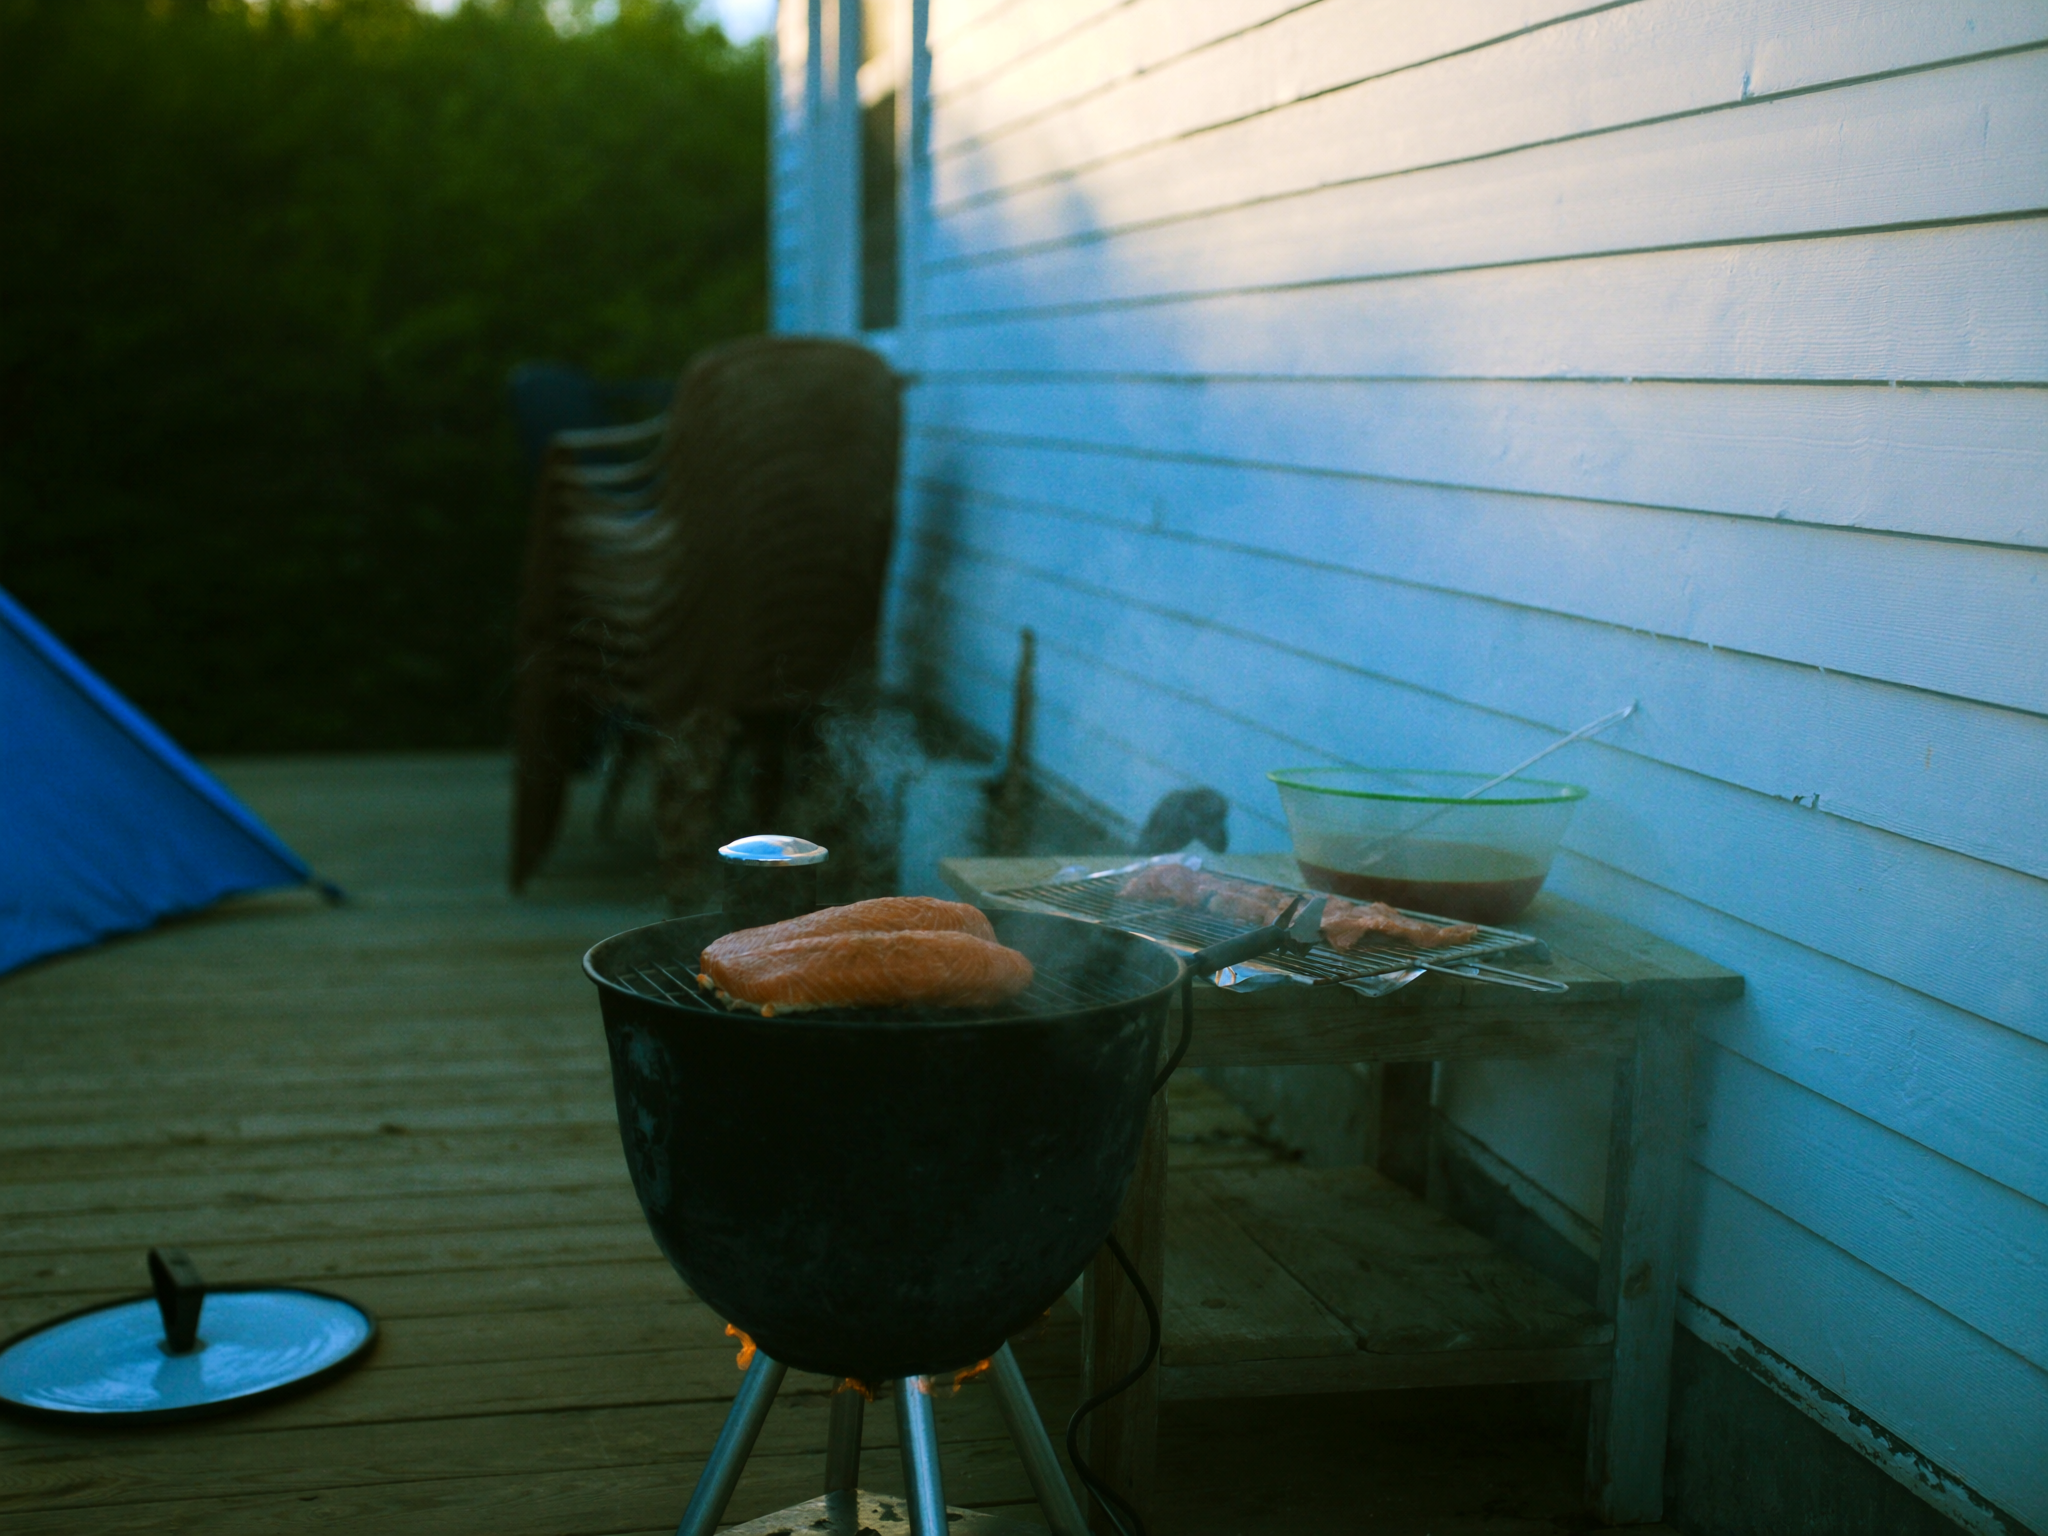
Hot smoking is the most popular and forgiving method of salmon preservation. It simultaneously cooks and smokes the fish at temperatures between 200–250°F, producing flaky, fully cooked fillets with a rich, smoky flavor and a golden-to-mahogany exterior. If you have never preserved salmon before, start here.
Equipment: Choosing Your Smoker
You do not need expensive equipment to hot-smoke salmon. For broader kitchen setup advice beyond smoking — including knives, thermometers, and essential tools for preparing any wild seafood — see our seafood kitchen guide. Here are the four most common smoker options, ranked from simplest to most versatile:
| Smoker Type | Price Range | Pros | Cons |
|---|---|---|---|
| Stovetop smoker | $30–$60 | Indoor use, fast, simple, no learning curve | Small batches only, limited smoke flavor |
| Electric smoker | $150–$400 | Set-and-forget temperature control, consistent results | Less smoky flavor than charcoal, needs electricity |
| Pellet smoker | $300–$800 | Excellent temperature control, strong smoke, versatile | Higher cost, requires pellets |
| Charcoal smoker | $50–$300 | Deepest smoke flavor, no electricity needed | Requires more attention, steeper learning curve |
Beginner Recommendation
An electric smoker in the $200 range is the ideal starting point. The Masterbuilt or Bradley brands are popular choices that provide consistent temperature control with minimal monitoring. You can focus on learning brines and wood pairings instead of managing charcoal.
Wood Selection: The Flavor Foundation
The type of wood you use defines the character of your smoked salmon. Different woods impart different flavor profiles, and choosing the right wood for your salmon species can elevate the finished product from good to extraordinary.
- Alder — The traditional Alaska choice. Mild, slightly sweet, with a clean finish. This is the wood Pacific Northwest fishermen have used for centuries, and it remains the gold standard for salmon. Pairs beautifully with every species. If you only ever use one wood for salmon, make it alder.
- Apple — Gentle, fruity sweetness that complements lighter species like coho and pink. Produces a beautiful golden color. Takes longer to build flavor, so it works best in longer smokes.
- Cherry — Mildly sweet with a hint of tartness. Creates a gorgeous reddish-mahogany exterior on salmon. Excellent with sockeye and king where the color contrast is dramatic.
- Hickory — Bold, bacon-like smokiness. Use with caution on salmon — a little goes a long way. Best blended 50/50 with alder or apple for a complex flavor without overpowering the fish.
- Maple — Subtle sweetness that pairs well with brown sugar or maple syrup brines. Lovely with king salmon where the fat content can handle the delicate smoke.
- Mesquite — Not recommended for salmon. Too strong and aggressive — it will overpower the fish. Save mesquite for beef brisket.
The Basic Brine: Salt, Sugar & Water
Every good smoked salmon starts with a brine. The brine seasons the fish throughout, helps preserve it, and draws out moisture to create the tacky surface (pellicle) that smoke adheres to. Here is the foundational recipe that works for any species:
Classic Smoked Salmon Brine
Ingredients
- 4 cups cold water
- 1/3 cup kosher salt (Diamond Crystal) or 1/4 cup Morton’s kosher
- 1/3 cup brown sugar (dark or light)
- 1 tablespoon black peppercorns
- 2 bay leaves
- Optional: 2 cloves garlic (smashed), 1 teaspoon onion powder, splash of soy sauce
Instructions
- Combine water, salt, and brown sugar. Stir until fully dissolved.
- Add peppercorns, bay leaves, and any optional aromatics.
- Submerge salmon fillets in brine. Refrigerate 8–12 hours (thinner fillets toward 8 hours, thick king fillets toward 12).
- Remove from brine and rinse under cold water. Pat dry with paper towels.
- Place on a wire rack and refrigerate uncovered for 2–4 hours to form the pellicle.
What is a pellicle? After brining, the surface of the salmon should feel dry and slightly tacky to the touch. This sticky protein layer is called the pellicle, and it is essential: smoke particles bond to the pellicle, creating that beautiful mahogany color and deep smoke flavor. Skip this step and your salmon will look pale and taste flat. Patience with the pellicle is the difference between amateur and exceptional smoked salmon.
Step-by-Step: Hot Smoking Process
- Prepare the salmon Remove pin bones. Leave skin on — it holds the fillet together on the rack and peels off cleanly after smoking. Cut into pieces that fit your smoker racks with at least 1 inch of space between each piece for airflow.
- Brine the salmon Submerge fillets in your brine solution. Refrigerate 8–12 hours. Thinner portions (under 1 inch) need less time; thick king fillets benefit from the full 12 hours. Do not exceed 14 hours or the salmon will become too salty.
- Rinse and dry Remove from brine, rinse under cold running water for 30 seconds per piece. Pat thoroughly dry with paper towels. This step removes excess surface salt.
- Form the pellicle Place fillets skin-side down on a wire rack set over a sheet pan. Refrigerate uncovered for 2–4 hours. Alternatively, place the rack in a cool, breezy spot (a fan works). The surface should feel dry and tacky, like the back of a Post-it note.
- Preheat the smoker Load your wood chips or pellets. Set the smoker to 150°F for the initial drying phase. This low-temperature start allows more smoke to penetrate the fish before the proteins set.
- Low smoke phase (1 hour) Place fillets skin-side down on oiled smoker racks. Smoke at 150°F for 1 hour. This phase builds the smoke foundation without cooking the interior. Keep the vent slightly open to maintain airflow.
- Increase to cooking temperature Raise the smoker to 200–225°F. Continue smoking for 1–2 additional hours, depending on thickness. The salmon is done when the internal temperature reaches 145°F and the flesh flakes easily.
- Watch for the albumin If white protein (albumin) starts beading on the surface, the temperature is climbing too fast. Reduce heat slightly. A slow, steady smoke minimizes albumin and produces a more attractive finished product.
- Rest and store Remove from smoker and let cool to room temperature (about 30 minutes). Store in the refrigerator for up to 10 days, or vacuum-seal and freeze for up to 3 months. Smoked salmon flavor actually improves overnight as the smoke penetrates deeper.
Temperature & Timing Guide
| Fillet Thickness | Low Phase (150°F) | Cook Phase (225°F) | Total Time | Internal Temp Goal |
|---|---|---|---|---|
| Under 3/4 inch (pink, keta tail) | 45 min | 45–60 min | 1.5–2 hours | 145°F |
| 3/4 – 1 inch (sockeye, coho) | 1 hour | 1–1.5 hours | 2–2.5 hours | 145°F |
| 1 – 1.5 inches (king center-cut) | 1 hour | 1.5–2 hours | 2.5–3 hours | 145°F |
| Over 1.5 inches (king collar/belly) | 1 hour | 2–3 hours | 3–4 hours | 145°F |
Species-Specific Smoking Tips
King Salmon (Chinook): The Richest Smoke
King salmon’s high fat content makes it the undisputed champion of the smoker. The abundant intramuscular fat bastes the flesh from within during smoking, keeping it incredibly moist even at higher temperatures. King produces the richest, most buttery smoked salmon you will ever taste. Use a full 12-hour brine and alder or cherry wood. The thick center-cut portions are ideal — the fat keeps them from drying out during the longer smoke time they require.
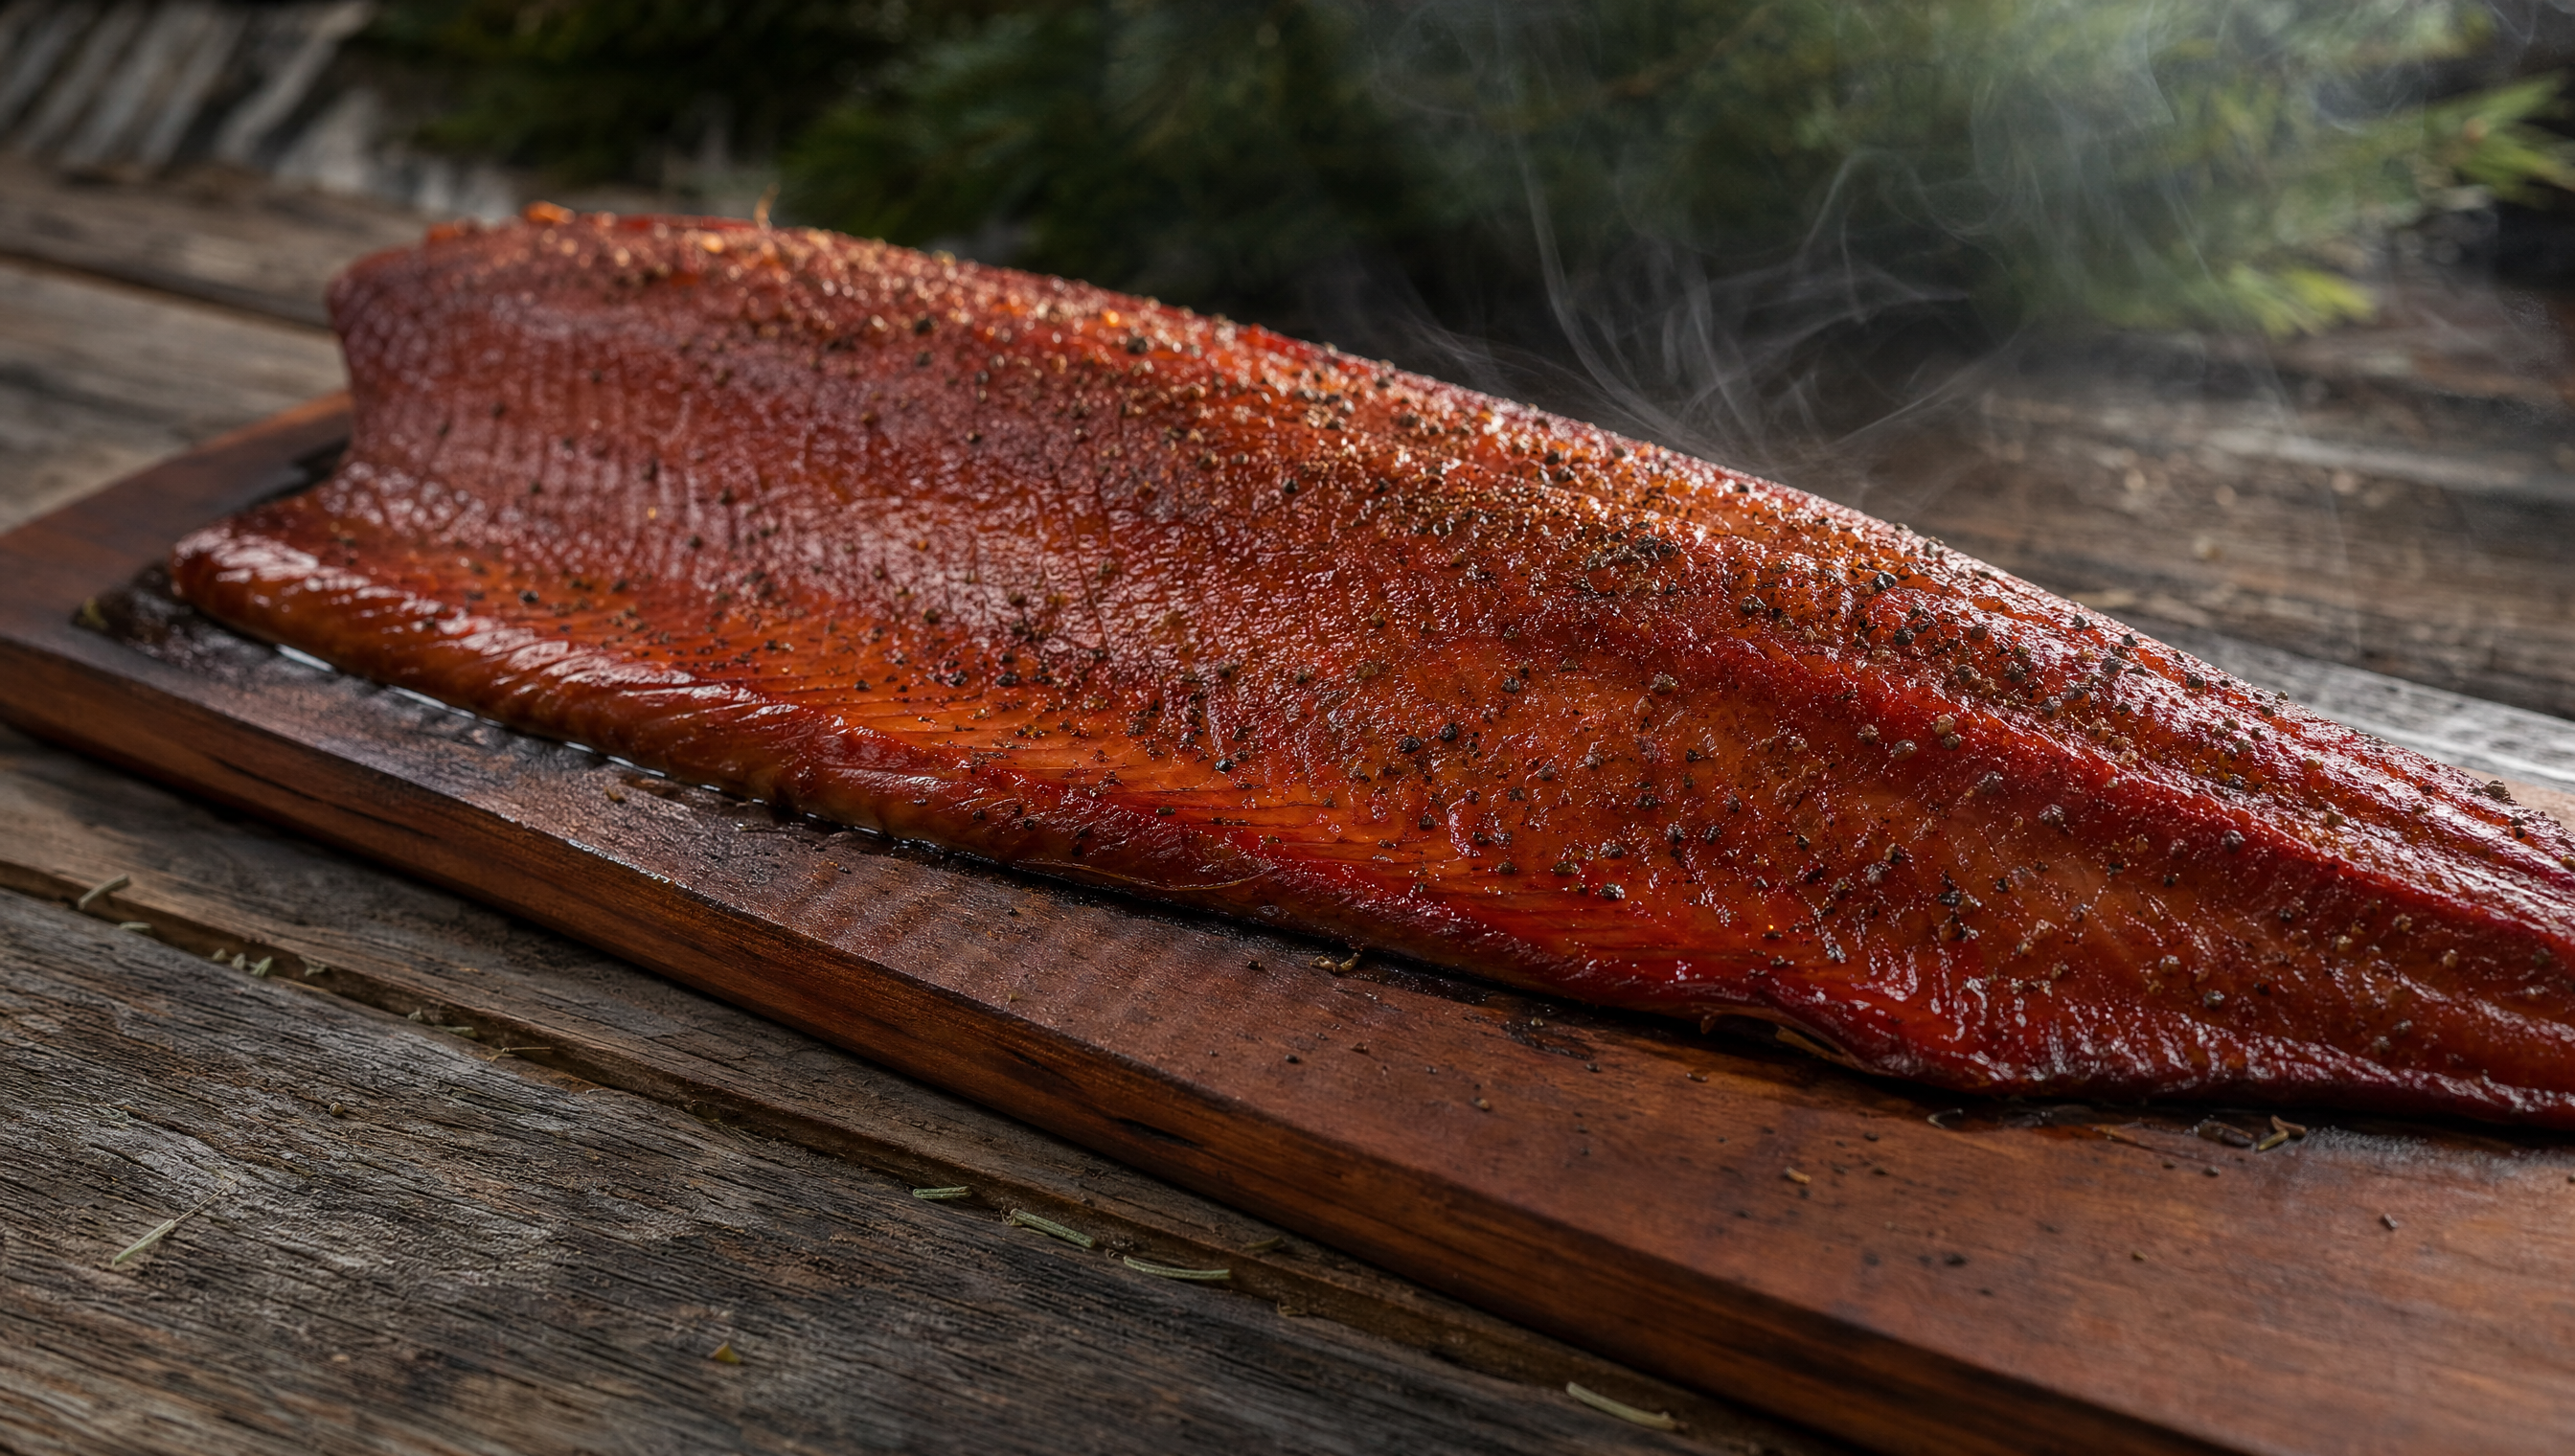
Sockeye Salmon: The Color King
Sockeye’s deep red flesh creates the most visually stunning smoked salmon. The color deepens and intensifies through smoking, producing fillets that look as spectacular as they taste. Sockeye’s firm texture holds up beautifully on the smoker rack. Its slightly more robust flavor pairs well with cherry or alder wood. Brine for 8–10 hours — sockeye’s dense flesh absorbs salt more slowly than fattier king.
Coho Salmon: The Crowd-Pleaser
Coho offers a milder, more approachable flavor when smoked — making it the best choice when you are serving people who are new to smoked salmon. Its medium fat content produces a moist but not overly rich finished product. Apple or maple wood complement coho’s delicate flavor. Brine for 8 hours. Watch the temperature carefully, as coho’s lower fat content means it can dry out faster than king or sockeye.
Pink Salmon: The Jerky Candidate
Pink salmon’s lean flesh actually makes it less ideal for traditional hot smoking (it dries out easily), but that same lean quality makes it outstanding for salmon jerky. If you do hot-smoke pink, keep the temperature lower (200°F max), use a shorter smoke time, and apply a heavier brine or a glaze (maple syrup or honey) during the last 30 minutes to add moisture. Pink is also excellent for canning.
Critical Safety Reminder
Always verify internal temperature with an instant-read thermometer. The FDA recommends cooking salmon to 145°F for food safety. Insert the probe into the thickest part of the fillet. Visual cues alone (flaking, color change) are not reliable indicators that the fish has reached a safe temperature throughout.
Storage after hot smoking: Refrigerate within 2 hours of removing from the smoker. Hot-smoked salmon keeps 7–10 days refrigerated, or vacuum-seal and freeze for up to 3 months. For best flavor, bring refrigerated smoked salmon to room temperature for 15 minutes before serving.
3. Cold Smoking Wild Salmon
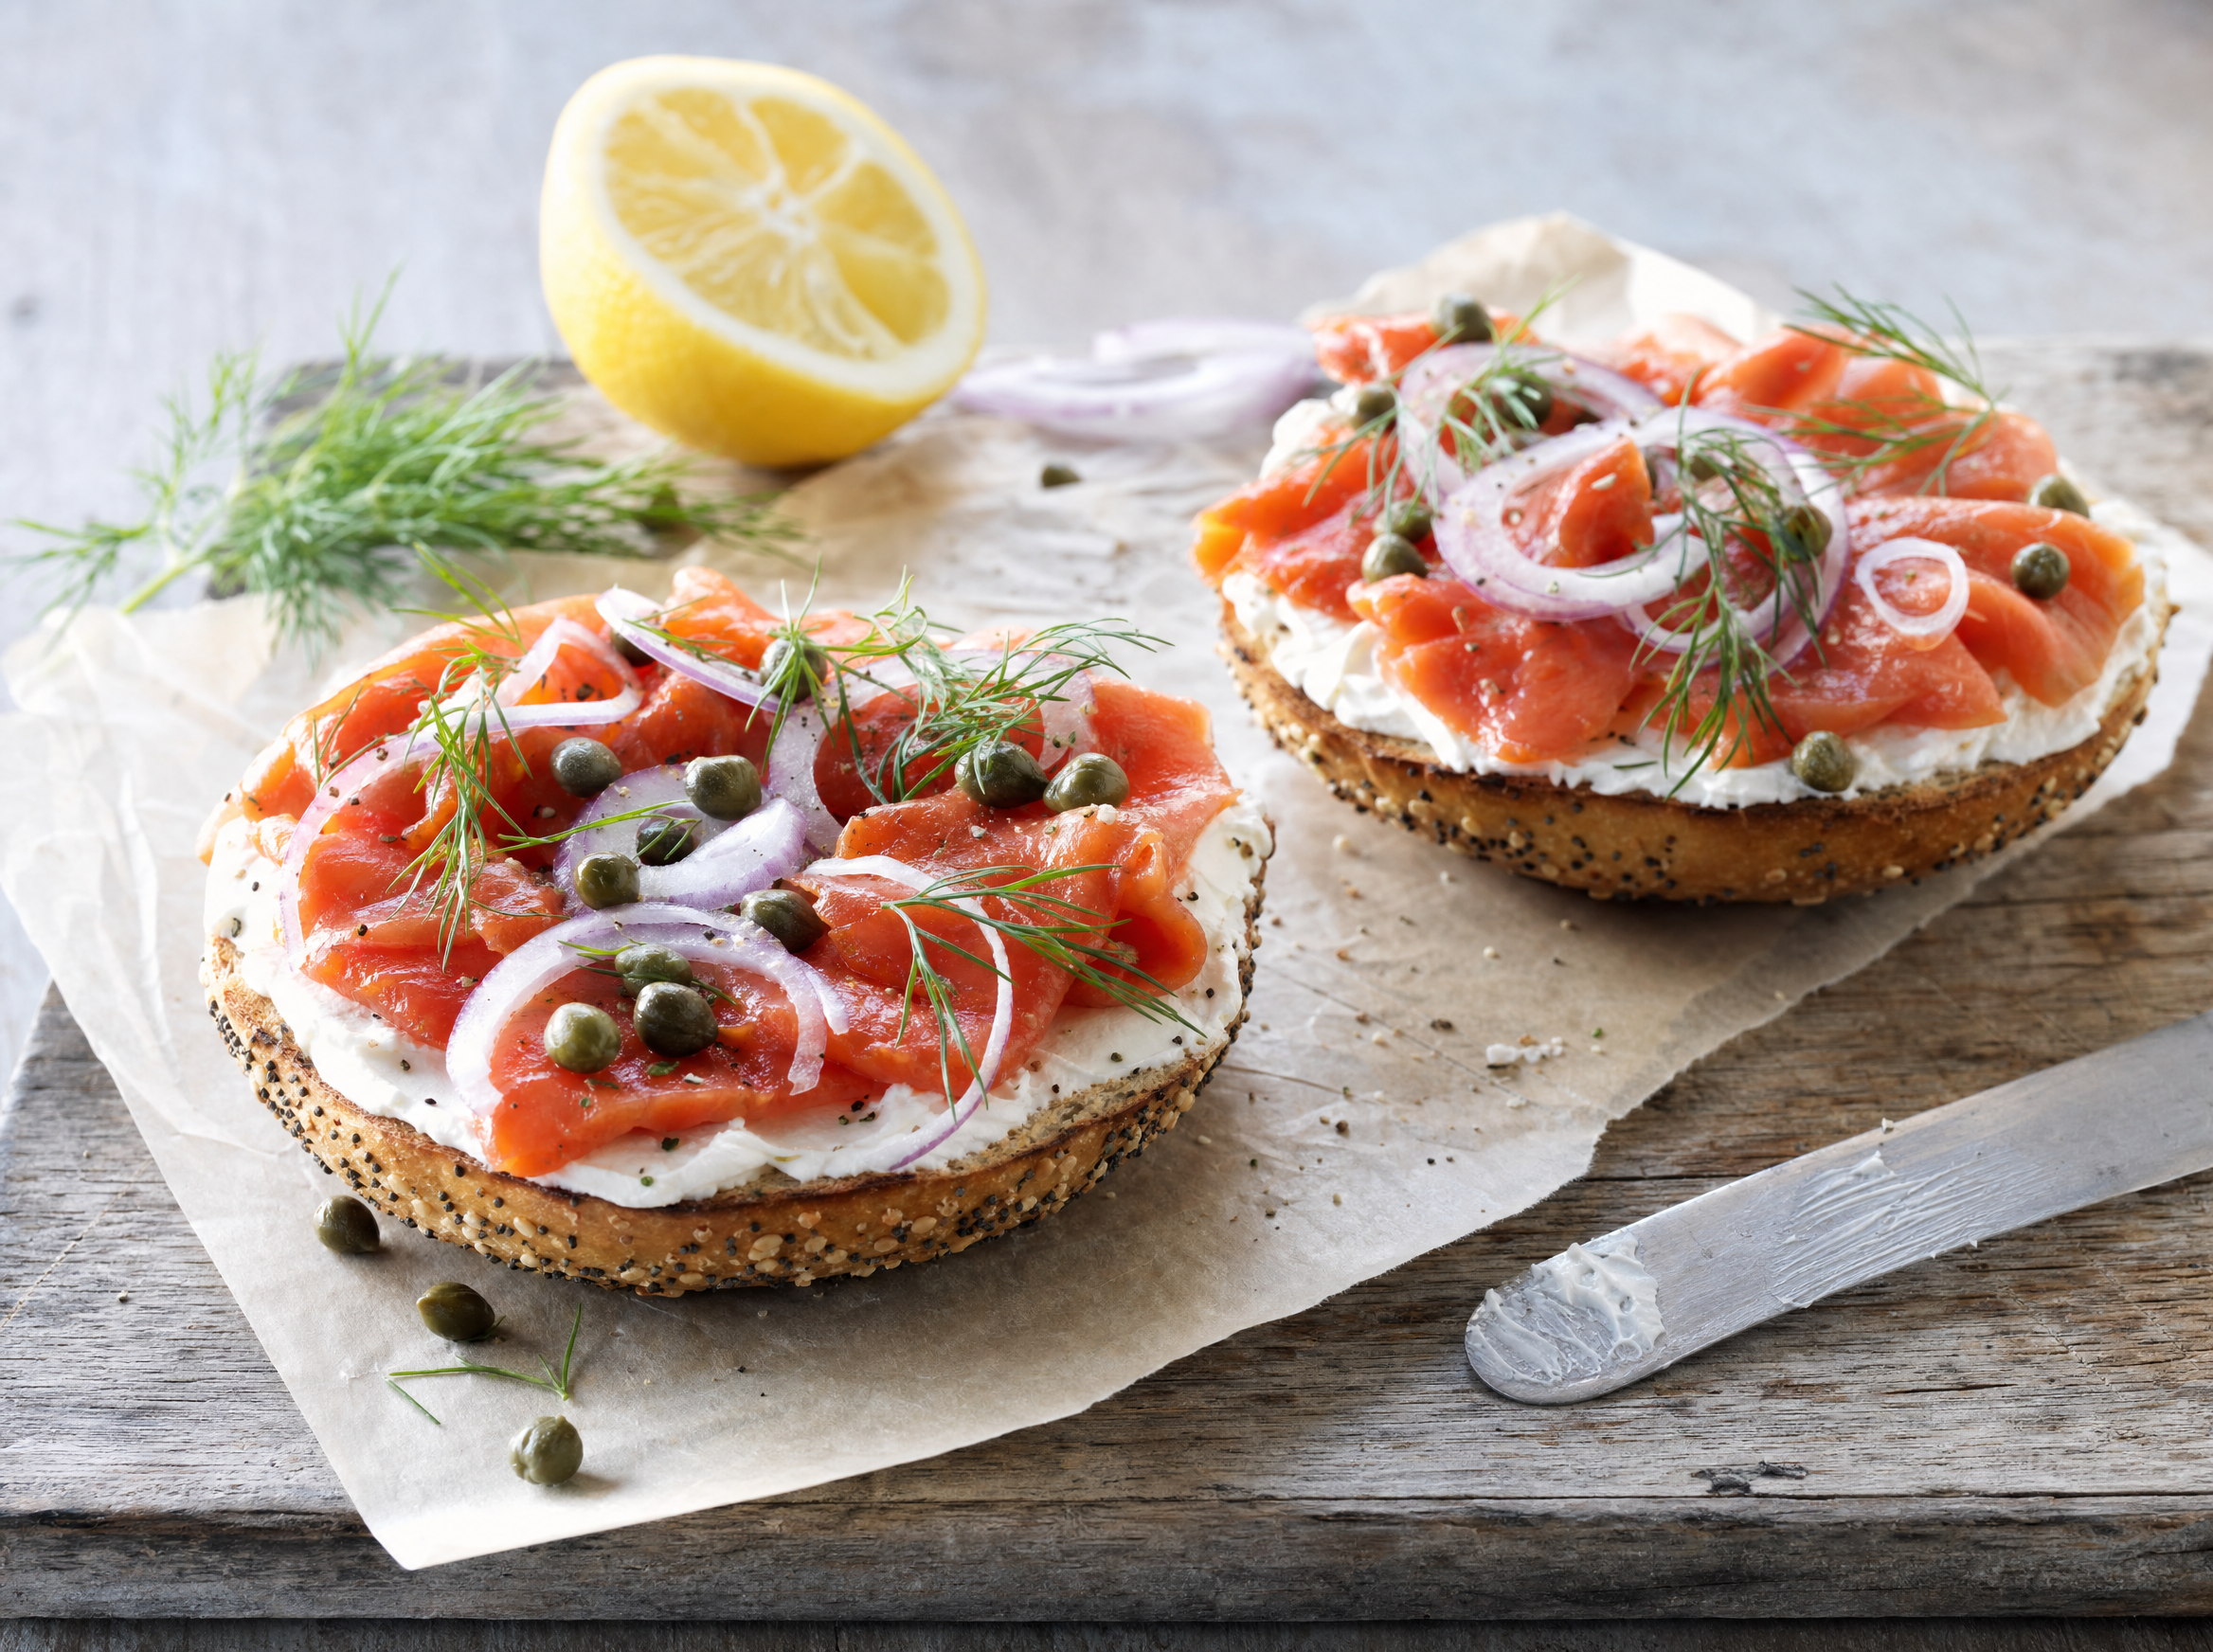
Cold smoking is the technique behind silky, translucent lox-style salmon — the kind you find draped over a bagel with cream cheese, capers, and red onion. Unlike hot smoking, cold smoking does not cook the fish. Instead, it infuses the salmon with smoke flavor at temperatures below 80°F, producing a raw-textured, intensely flavored product that slices paper-thin.
Cold smoking is a more advanced technique that demands respect for food safety. Because the salmon never reaches cooking temperatures, you are relying entirely on the initial salt cure to inhibit bacterial growth, including the dangerous Clostridium botulinum. Done properly, cold-smoked salmon is one of the great culinary luxuries. Done carelessly, it can be dangerous.
Cold Smoking vs. Hot Smoking
Hot Smoking (200–225°F)
Texture: Flaky, fully cooked, firm
Flavor: Pronounced smoky, robust
Appearance: Opaque, golden-mahogany exterior
Food safety: Cooked to 145°F — moderate risk
Shelf life: 7–10 days refrigerated
Serving: Eat as-is, in salads, pasta, spreads
Cold Smoking (Below 80°F)
Texture: Silky, raw-like, sliceable
Flavor: Delicate smoky, buttery
Appearance: Translucent, amber-tinted
Food safety: Not cooked — higher risk, salt cure essential
Shelf life: 2–3 weeks refrigerated (vacuum-sealed)
Serving: Sliced thin on bagels, canapés, sushi
Equipment for Cold Smoking
Cold smoking requires generating smoke without significant heat. Most home smokers operate too hot for cold smoking, so you need an external smoke source or a specialized attachment:
- Cold smoke generator (tube or maze). The most popular option for home use. These are perforated metal tubes or maze-shaped trays that you fill with wood pellets or sawdust and light at one end. They produce smoke for 4–8 hours without generating enough heat to cook the fish. Brands like A-MAZE-N and Smoke Daddy are well-regarded. Place the generator inside your smoker (which remains unheated) or in a connected chamber.
- External smoke box with duct. A small firebox connected to your main smoking chamber by a length of dryer duct or pipe. The distance cools the smoke before it reaches the fish. This is the traditional method and produces the most authentic cold smoke. You can build one with a cardboard box, a soldering iron, and a length of dryer vent.
- Smoking gun. Handheld devices that produce a small amount of smoke from wood chips. Best for quick cold-smoking applications or adding finishing smoke to already-cured salmon. Not ideal for the long, deep smoke needed for traditional cold-smoked salmon.
Critical: Salt Cure Before Cold Smoking
Cold smoking without a proper initial salt cure is dangerous. The warm, moist, low-oxygen environment inside a cold smoker is ideal for Clostridium botulinum growth. The salt cure inhibits bacterial growth and is not optional. Always dry-cure or heavy-brine your salmon for a minimum of 24 hours before cold smoking. Use curing salt (Prague Powder #1) if available, at 1 teaspoon per 5 pounds of fish, mixed with your kosher salt and sugar.
Step-by-Step: Cold Smoking Process
- Prepare the cure Mix a dry cure: 1 cup kosher salt, 1/2 cup brown sugar, 1 teaspoon Prague Powder #1 (optional but strongly recommended), and 1 tablespoon cracked black pepper. For a 2–3 lb side of salmon, you will need roughly 2 cups of cure mixture.
- Apply the cure Spread a thick layer of cure mixture on a sheet of plastic wrap. Place the salmon fillet skin-side up on the cure. Pack the remaining cure mixture on top and around the sides of the fish. Every surface should be in contact with cure. Wrap tightly in the plastic wrap.
- Cure under weight Place the wrapped salmon on a sheet pan or in a baking dish. Set another pan on top and weight it with cans or a brick — about 2–3 pounds of even pressure. This helps the cure penetrate uniformly and presses out excess moisture. Refrigerate for 24–48 hours, flipping the fish once at the halfway point.
- Rinse and equalize Remove the salmon from the cure. Rinse thoroughly under cold running water for 2–3 minutes. Pat dry. Place on a wire rack and refrigerate uncovered for 12–24 hours. This equalization step allows the salt to distribute evenly throughout the flesh and forms a firm pellicle.
- Set up the cold smoke Load your cold smoke generator with alder or apple wood pellets or sawdust. Position the salmon in your smoker on racks with good airflow. The ambient temperature inside the smoker must stay below 80°F. Smoke on a cool day (below 60°F outside) or use ice pans in the smoker to keep temperatures down.
- Smoke for 12–24 hours Cold-smoke the salmon for 12–24 hours, depending on how intense you want the smoke flavor. For a light, delicate smoke (European style), 12–14 hours is sufficient. For a deeper, more pronounced smoke (Pacific Northwest style), go 18–24 hours. Refill the smoke generator as needed.
- Rest and slice After smoking, wrap the salmon tightly and refrigerate for at least 12 hours (overnight is ideal). This rest period allows the smoke to mellow and distribute through the flesh. Slice paper-thin on a bias with a long, sharp knife. Slice away from the skin, stopping just before you reach it.
Achieving Lox-Style Texture
True lox is actually salt-cured salmon that is not smoked at all — the word comes from the Yiddish word for salmon (laks). What most people call "lox" at their local bagel shop is technically cold-smoked salmon, also known as "Nova" or "Nova Scotia style." To achieve that silky, almost buttery texture:
- Use the fattiest species available: king salmon is ideal, followed by sockeye. The high fat content melts on the tongue and gives that luscious mouthfeel.
- Cure for 24 hours (not longer). Over-curing makes the texture firm and jerky-like rather than silky.
- Aim for a lighter smoke — 12–14 hours with a gentle, thin stream of smoke. Heavy smoke creates a firmer exterior that disrupts the silky consistency.
- After the rest period, the salmon should be firm enough to slice but still yield gently when pressed. If it feels too firm, you cured too long. If it is too soft to slice, wrap it tightly and freeze for 30 minutes to firm it up.
Best Species for Cold Smoking
King Sockeye King salmon produces the richest, most luxurious cold-smoked product. Its high fat content creates that melt-on-your-tongue texture. Sockeye is a close second, with stunning deep red color that makes beautiful presentations. Coho works but produces a leaner, slightly drier result.
4. Making Gravlax (Scandinavian Cured Salmon)
Gravlax is the simplest and most elegant method of salmon preservation. No smoker, no special equipment, no heat source — just salt, sugar, fresh dill, and time. The word comes from the Scandinavian gravad lax, meaning "buried salmon," a reference to the medieval Nordic practice of burying salted salmon in the ground to ferment. Modern gravlax is far more refined: a silky, herb-scented cured salmon that is one of the crowning achievements of Scandinavian cuisine.
The beauty of gravlax is its accessibility. If you can mix salt and sugar and you own a refrigerator, you can make world-class gravlax at home. The process takes 48–72 hours of hands-off curing, and the result is a luxurious appetizer that costs a fraction of what you would pay at a specialty shop.
Classic Gravlax Recipe
Traditional Dill Gravlax
Ingredients
- 1 side wild salmon (1.5–2 lbs), skin on, pin bones removed
- 1/4 cup kosher salt
- 1/4 cup granulated sugar
- 1 tablespoon coarsely ground black pepper
- 1 large bunch fresh dill (about 2 cups, loosely packed)
- Zest of 1 lemon (optional)
Instructions
- Mix the salt, sugar, and black pepper in a bowl.
- Lay a large sheet of plastic wrap on the counter. Spread half the dill on the plastic wrap in a bed the size of the fillet.
- Place the salmon skin-side down on the dill. Spread the salt-sugar mixture evenly over the flesh, pressing it gently into the surface. Pile the remaining dill on top.
- Wrap tightly in plastic wrap. Place in a baking dish or sheet pan (to catch liquid that will weep out).
- Weight the salmon: set another pan on top and add 2–3 lbs of weight (cans, a brick, a cast iron skillet).
- Refrigerate 48–72 hours, flipping the package once a day. Drain any accumulated liquid.
- Unwrap, scrape off the dill and cure. Do not rinse. Pat dry with paper towels.
- Slice on a sharp bias, paper-thin, cutting away from the skin.
The 48-hour cure produces a lighter, more delicate gravlax with a slightly softer texture. At 72 hours, the cure has penetrated deeper, creating a firmer texture with a more pronounced salt-sweet balance. Most people prefer the 48–60 hour range.
Flavor Variations
Classic dill gravlax is just the beginning. Once you have mastered the basic technique, these variations open up a world of creative curing:
Beet-Cured Gravlax
Add 1 cup of finely grated raw beet to your cure mixture. The beet juice stains the exterior of the salmon a dramatic magenta while the interior remains the natural salmon color. The result is visually stunning when sliced, with a subtle earthy sweetness that pairs beautifully with horseradish cream. Cure for a full 72 hours to allow the beet color to penetrate.
Gin & Juniper Gravlax
Replace the dill with fresh rosemary or thyme. Add 2 tablespoons of crushed juniper berries and 2 tablespoons of gin to the cure. The botanical flavors of the gin and juniper create a sophisticated, aromatic gravlax that pairs perfectly with pumpernickel bread and grain mustard. This is the Scandinavian variation most popular in Denmark.
Citrus-Cured Gravlax
Add the zest of 2 oranges and 1 lime to your cure along with 1 teaspoon of coriander seeds (lightly crushed). Replace the dill with fresh cilantro. The bright citrus notes create a lighter, more refreshing cure that works beautifully with coho salmon. Serve with avocado crema and thinly sliced radishes.
Mustard & Brown Sugar Gravlax
Substitute brown sugar for the white sugar and add 2 tablespoons of whole-grain mustard to the cure mixture. Use dill or tarragon as the herb. The mustard adds a gentle heat and complexity that cuts through the richness of king salmon. Serve with the traditional Swedish hovmastarsas (mustard-dill sauce).
Which Species Work Best for Gravlax
| Species | Gravlax Quality | Notes |
|---|---|---|
| King (Chinook) | Exceptional | Richest, most luxurious. High fat produces buttery, melt-in-mouth texture. The classic choice for premium gravlax. |
| Sockeye (Red) | Excellent | Beautiful deep color, firm texture, bold flavor. The most visually impressive gravlax. |
| Coho (Silver) | Very good | Milder, more delicate. Works especially well with citrus and lighter cure variations. Great for gravlax beginners. |
| Pink (Humpy) | Fair | Too lean for classic gravlax — texture becomes dry. Can work with a shorter cure (36 hours) and a sugar-heavy cure ratio. |
| Keta (Chum) | Fair | Firm texture but lower fat means less luscious mouthfeel. Better suited to heavier cure variations with beet or mustard. |
Serving Suggestions
Gravlax is a show-stopping appetizer that requires almost no effort to present beautifully. Arrange paper-thin slices on a platter and pair with any of the following:
- Classic Scandinavian: dark rye bread, crème fraîche, fresh dill, capers, thinly sliced red onion, lemon wedges
- Brunch spread: toasted bagels, cream cheese, cucumber, chives, everything bagel seasoning
- Elegant canapés: pumpernickel rounds, horseradish cream, microgreens, a dot of mustard
- Asian-inspired: steamed rice, pickled ginger, soy, sesame seeds, shiso leaves
- Salad: baby arugula, shaved fennel, citrus segments, olive oil, flaky salt
Storage: Well-cured gravlax keeps for 5–7 days in the refrigerator, tightly wrapped in plastic. You can also freeze gravlax (unsliced) for up to 2 months. Slice only what you plan to serve — once sliced, it dries out within a day or two.
5. Salmon Jerky & Dried Fish
Alaska Native Tradition: Preserving Salmon for Millennia
Dried salmon is one of the oldest and most important foods in the history of the Pacific Northwest and Alaska. For thousands of years, indigenous peoples along the Pacific Coast and interior rivers have dried salmon as their primary method of preservation — transforming the enormous summer salmon runs into a portable, shelf-stable food that could sustain communities through long winters.
The traditional method varies by region and people. In coastal communities, salmon was often split and hung on wooden racks in the open air, dried by the wind and sun. In interior Alaska, salmon strips were hung in smokehouses over slow-burning fires, where the combination of smoke and dry heat removed moisture while adding preservative compounds. The Yup’ik, Athabascan, Tlingit, and other Alaska Native peoples each developed their own techniques, often passed down through generations as carefully guarded family methods.
Today, modern salmon jerky carries this tradition forward. Whether you use a dehydrator, an oven, or a smoker set to low temperature, the fundamental principle remains the same: remove moisture from the fish to inhibit bacterial growth, creating a concentrated, protein-rich food with an extended shelf life.
Modern Jerky Methods: Dehydrator vs. Oven
| Method | Temperature | Time | Pros | Cons |
|---|---|---|---|---|
| Dehydrator | 145–155°F | 6–10 hours | Consistent results, best airflow, most efficient | Requires equipment ($50–$200) |
| Oven | 170–200°F | 3–5 hours | No extra equipment, faster | Harder to control, less even drying |
| Smoker (low temp) | 150–175°F | 5–8 hours | Adds smoke flavor, traditional method | Requires smoker, more attention |
USDA Recommendation
For food safety, the USDA recommends heating salmon to an internal temperature of 160°F before dehydrating, or using a dehydrator that maintains at least 145°F throughout the drying process. This ensures pathogens are destroyed during the drying process.
Step-by-Step: Making Salmon Jerky
- Select and prepare the salmon Choose lean species: pink or keta are ideal, coho works well. Remove skin and all pin bones. Cut into strips 1/4 inch thick and 1 inch wide, cutting with the grain of the fish (this creates strips that hold together during drying). Consistent thickness is critical for even drying.
- Marinate Prepare your marinade (see recipes below). Submerge the salmon strips and refrigerate for 4–12 hours. The marinade adds flavor, and the salt content helps draw moisture from the fish, beginning the preservation process.
- Drain and pat dry Remove strips from the marinade. Pat each strip thoroughly dry with paper towels. Excess surface moisture will dramatically slow the drying process.
- Arrange for drying For a dehydrator: lay strips in a single layer on each tray with space between for airflow. For an oven: place strips on wire racks set over sheet pans. Prop the oven door open slightly (a wooden spoon works) to allow moisture to escape.
- Dry at temperature Dehydrator: set to 145–155°F and dry for 6–10 hours. Oven: set to 170°F (or the lowest setting) for 3–5 hours. Check every 1–2 hours and rotate trays for even drying. The jerky is done when it bends and cracks slightly but does not snap in half.
- Test for doneness Let a piece cool to room temperature (it firms up as it cools). Bend it — it should flex and crack on the surface but not break completely. If it is still moist or pliable, continue drying. If it snaps cleanly, it is over-dried (still edible, just very crunchy). Under-drying is a food safety risk; when in doubt, dry longer.
- Cool and store Cool completely before packaging. Store in airtight containers or vacuum-sealed bags. Properly dried jerky keeps for 1–2 weeks at room temperature, 1 month refrigerated, or 3–6 months frozen.
Marinade Recipes for Salmon Jerky
Teriyaki Salmon Jerky
Ingredients (for 2 lbs fresh salmon)
- 1/2 cup soy sauce (or tamari for gluten-free)
- 1/4 cup brown sugar
- 2 tablespoons rice vinegar
- 1 tablespoon sesame oil
- 2 cloves garlic, minced
- 1 teaspoon fresh ginger, grated
- 1/2 teaspoon red pepper flakes (optional)
Combine all ingredients. Submerge strips and refrigerate 8–12 hours. Drain, pat dry, and dehydrate at 150°F for 6–8 hours.
Peppered Salmon Jerky
Ingredients (for 2 lbs fresh salmon)
- 1/4 cup soy sauce
- 2 tablespoons Worcestershire sauce
- 1 tablespoon coarsely cracked black pepper
- 1 tablespoon brown sugar
- 1 teaspoon garlic powder
- 1 teaspoon onion powder
- 1/2 teaspoon smoked paprika
Whisk together all ingredients. Marinate strips 6–8 hours in the refrigerator. Drain, pat dry, and dehydrate at 150°F for 6–8 hours.
Honey Garlic Salmon Jerky
Ingredients (for 2 lbs fresh salmon)
- 1/3 cup soy sauce
- 3 tablespoons honey
- 3 cloves garlic, minced
- 1 tablespoon apple cider vinegar
- 1 teaspoon onion powder
- 1/2 teaspoon black pepper
- Pinch of cayenne (optional)
Whisk together all ingredients until honey dissolves. Marinate strips 8–12 hours. Drain, pat dry, and dehydrate at 150°F for 7–9 hours. The honey creates a slight caramelized glaze on the finished jerky.
Which Species Make the Best Jerky?
Lean species produce the best jerky. Fat does not dehydrate well — it can become rancid and shortens shelf life. Here is the species ranking for jerky, from best to least suitable:
- Pink Pink (Humpy): The ideal jerky salmon. Very lean flesh dries evenly, creates a firm yet chewable texture, and has a mild flavor that takes on marinades beautifully. Low fat means long shelf life. This is where pink salmon truly excels.
- Keta Keta (Chum): Firm, meaty texture and low-to-medium fat make keta an excellent jerky candidate. Slightly more flavor than pink, with a satisfying chew. Traditional Alaska Native dried salmon was often made from keta.
- Coho Coho (Silver): Medium fat content works for jerky if you cut strips thinner (3/16 inch) and dry a bit longer. Produces a richer, more flavorful jerky than pink or keta.
- Sockeye and King: Not recommended for jerky. Their high fat content causes uneven drying, faster rancidity, and a greasy texture. Save these species for smoking and gravlax where the fat is an asset.
Yield math: Salmon loses approximately 60–70% of its weight during dehydration. Expect 2 pounds of fresh salmon strips to produce roughly 8–10 ounces of finished jerky. Plan accordingly when buying fish — you will need more raw material than you might expect.
6. Canning Wild Salmon at Home
Home-canned salmon is a pantry staple in fishing communities throughout Alaska. It produces tender, shelf-stable jars of salmon that can be stored for 1–2 years without refrigeration — ready for salmon patties, pasta, chowder, or simply eating straight from the jar with crackers. Canning is particularly well-suited to lean species like pink and keta, which can sometimes be less desirable for other preparations but produce excellent canned salmon that rivals or exceeds commercial brands.
Critical: Pressure Canning ONLY
Fish is a low-acid food and must be processed in a pressure canner to reach the 240°F temperature needed to destroy Clostridium botulinum spores. Water bath canning reaches only 212°F and is not safe for fish under any circumstances. Do not use a pressure cooker as a substitute for a proper pressure canner — they are not the same equipment and pressure cookers may not maintain consistent pressure. Use only a weighted-gauge or dial-gauge pressure canner that has been tested and calibrated.
Equipment Needed
- Pressure canner — weighted-gauge (Presto, All American) or dial-gauge. Must be able to hold at least 4 quart jars. All American is the gold standard for home canners. Budget $80–$200.
- Half-pint or pint mason jars — Wide-mouth are easier to fill. Half-pints (8 oz) are the most common size for salmon. Use only jars manufactured for canning (Ball, Kerr).
- New lids — Lids can only be used once. Rings can be reused if they are in good condition (no rust, no dents). Always use new, unwarped lids for each canning session.
- Jar lifter — Essential for safely removing hot jars from boiling water. Do not attempt to can without one.
- Bubble remover / headspace tool — For removing air pockets and measuring headspace. A chopstick works in a pinch.
Step-by-Step: Pressure Canning Salmon
- Prepare the salmon Remove skin if desired (skin-on is fine and adds flavor and nutrients). Remove pin bones, fins, and dark bloodline. Cut into chunks that fit your jars with 1 inch of headspace at the top. You do not need to cook the salmon first — raw-pack is the standard method and produces better texture than hot-pack.
- Sterilize jars and prepare lids Wash jars in hot, soapy water and rinse. Place jars in simmering (not boiling) water until ready to fill. Warm the lids in hot (not boiling) water to soften the sealing compound. Inspect each jar for chips or cracks — discard any damaged jars.
- Pack the jars Pack raw salmon chunks firmly into jars, leaving 1 inch of headspace. Add 1/2 teaspoon of canning salt per half-pint (optional but recommended for flavor). Do not add liquid — the salmon releases its own juices during processing. Run a bubble remover around the inside edge to release trapped air.
- Wipe rims and seal Use a clean, damp cloth to wipe jar rims thoroughly. Even a small bit of oil or salmon on the rim can prevent a proper seal. Place a warm lid on each jar and screw the ring on finger-tight — snug but not overly tightened.
- Load the canner Place jars on the rack inside the pressure canner. Add 2–3 inches of hot water (check your canner’s manual for the exact amount). Jars should not touch each other or the sides of the canner. Lock the lid in place.
- Vent and pressurize Heat until steam vents steadily from the vent pipe. Allow steam to vent for 10 minutes to exhaust all air from the canner. Then close the vent (place the weight on a weighted-gauge canner, or close the petcock on a dial-gauge) and allow pressure to build to 10 PSI at sea level.
- Process at pressure Once the canner reaches the correct pressure, start timing. Process half-pint jars for 100 minutes and pint jars for 100 minutes at 10 PSI (sea level). Adjust pressure for altitude: add 1 PSI for every 1,000 feet above 1,000 feet elevation. Maintain steady pressure throughout — fluctuations can cause liquid loss and seal failures.
- Cool naturally When processing time is complete, turn off the heat and let the canner depressurize naturally. Do not try to speed up cooling — this takes 30–60 minutes. When the pressure gauge reads zero, wait 10 more minutes, then carefully remove the lid (tilt it away from you to avoid steam burns).
- Remove and rest Use a jar lifter to remove jars. Place on a towel-covered surface, spaced 1 inch apart. Do not tilt or shake the jars. Let them cool undisturbed for 12–24 hours. You should hear the lids "pop" as they seal during cooling — a satisfying sound.
- Check seals and store After 24 hours, press the center of each lid. If it is concave and does not flex, the seal is good. If the lid springs up and down, the jar did not seal — refrigerate and eat within a week. Remove rings for storage (they can trap moisture and cause rust). Label with the date and species. Store in a cool, dark place for up to 1–2 years.
Altitude Adjustments for Pressure Canning
| Altitude | Weighted-Gauge (PSI) | Dial-Gauge (PSI) |
|---|---|---|
| 0–1,000 ft | 10 | 11 |
| 1,001–2,000 ft | 15 | 11 |
| 2,001–4,000 ft | 15 | 12 |
| 4,001–6,000 ft | 15 | 13 |
| 6,001–8,000 ft | 15 | 14 |
| Above 8,000 ft | 15 | 15 |
Best Species for Canning
Pink and keta are the preferred species for home canning. Their lean flesh produces a firm, flaky product with a mild flavor that works beautifully in recipes. Sockeye also cans well and produces stunning red-colored jars. King and coho can be canned but their higher fat content makes them better suited to smoking and gravlax where that richness is an asset.
7. Salt Curing & Brining Techniques
Salt is the foundation of nearly every preservation method covered in this guide. Whether you are brining salmon before smoking, dry-curing for gravlax, or preparing fish for cold storage, understanding salt curing is the single most important skill in fish preservation. The technique is ancient, the science is straightforward, and mastering the basics will make every other preservation method in this guide more successful.
Dry Cure vs. Wet Brine: When to Use Each
| Characteristic | Dry Cure | Wet Brine |
|---|---|---|
| Method | Salt mixture packed directly onto fish | Fish submerged in salted water solution |
| Best for | Gravlax, cold smoking, lox, concentrated flavor | Hot smoking, jerky prep, even, gentle seasoning |
| Intensity | Higher — direct contact produces stronger cure | Lower — diluted salt for gentler, more even cure |
| Moisture effect | Draws moisture out aggressively, firms texture | Draws some moisture out but also seasons internally |
| Time | 24–72 hours depending on thickness | 4–24 hours depending on concentration |
| Control | Less uniform; thinner areas cure faster | More uniform; consistent salt penetration |
| Flavor additions | Sugar, herbs, spices, citrus zest mixed into cure | Sugar, aromatics, soy sauce, garlic in brine |
When in doubt, use a wet brine. Wet brines are more forgiving for beginners because the salt concentration is diluted and the cure penetrates more evenly. You are less likely to over-salt your salmon with a wet brine. Dry cures produce more intense results but require more precision — save them for after you have a few batches of wet-brined, hot-smoked salmon under your belt.
Salt Ratios & Cure Times
Wet Brine Ratios
| Brine Strength | Salt Per Quart Water | Use | Brine Time |
|---|---|---|---|
| Light brine | 2 tablespoons kosher salt | Delicate hot-smoke, mild flavor | 4–6 hours |
| Standard brine | 1/3 cup kosher salt | All-purpose smoking brine (recommended) | 8–12 hours |
| Heavy brine | 1/2 cup kosher salt | Cold smoke prep, longer preservation | 6–8 hours |
| Saturation brine | 1 cup kosher salt | Quick brine for thin strips (jerky) | 1–2 hours |
Always add sugar to your brine — it balances the salt, promotes browning during smoking, and adds a subtle sweetness that enhances the salmon’s natural flavor. The standard ratio is equal parts salt and brown sugar by volume. You can adjust sugar up (for sweeter, candy-style smoked salmon) or down (for a more savory, traditional cure).
Dry Cure Ratios
| Cure Type | Ratio (Salt : Sugar) | Application Per Pound | Cure Time |
|---|---|---|---|
| Classic gravlax | 1 : 1 | 2–3 tablespoons total per pound | 48–72 hours |
| Cold smoke prep | 2 : 1 (more salt) | 3–4 tablespoons total per pound | 24–48 hours |
| Lox (salt only) | Salt only (no sugar) | 1/4 cup kosher salt per pound | 24–36 hours |
| Light cure (serving same day) | 1 : 1.5 (more sugar) | 1–2 tablespoons total per pound | 30 min–2 hours |
Cure Ingredient Guide
Salts
- Diamond Crystal kosher salt: The gold standard for fish curing. Large, hollow flakes dissolve evenly and are easy to measure consistently. All recipes in this guide use Diamond Crystal measurements.
- Morton’s kosher salt: Denser than Diamond Crystal. Use 25% less than Diamond Crystal measurements. Two tablespoons of Morton’s equals roughly 3 tablespoons of Diamond Crystal.
- Sea salt (fine): Works well for brines. Avoid coarse sea salt for dry cures unless you grind it first — the large crystals do not dissolve evenly on the fish surface.
- Prague Powder #1 (curing salt): A mixture of 93.75% table salt and 6.25% sodium nitrite. Inhibits botulism and gives cured salmon a rosy color. Recommended (not required) for cold smoking. Use sparingly: 1 teaspoon per 5 pounds of fish. Never exceed this ratio — too much nitrite is toxic.
- Table salt: Not recommended. Contains anti-caking agents and iodine that can cause off-flavors and discoloration in cured fish.
Sugars
- Brown sugar (dark or light): The most common curing sugar for salmon. Adds color, moisture, and a subtle molasses depth. Dark brown sugar gives a richer, more caramel-like flavor.
- White granulated sugar: Cleaner flavor, lets the salmon and smoke shine. Standard for gravlax and Scandinavian cures.
- Maple sugar or maple syrup: Beautiful pairing with salmon, especially king. Creates a distinctive Pacific Northwest flavor profile. If using syrup in a dry cure, reduce it to a thick consistency first.
- Honey: Works in wet brines and jerky marinades. Creates a glossy finish on smoked salmon. Dissolve in warm water before adding to cold brine.
Aromatics
- Black pepper: The universal curing companion. Coarsely cracked for dry cures, whole peppercorns for brines.
- Fresh dill: The classic gravlax herb. Use generously — entire bunches, not pinches.
- Juniper berries: Lightly crushed, they add a piney, gin-like aroma. Traditional in Scandinavian cures.
- Bay leaves: 2–3 leaves per quart of brine add subtle herbal depth.
- Garlic: Smashed cloves in brines, granulated in dry cures. Use moderately — garlic can overwhelm delicate salmon.
- Citrus zest: Lemon, orange, or lime zest brightens cures beautifully. Use fresh zest only, and add it to dry cures (not brines, where the oils dissipate).
- Soy sauce: A splash in wet brines adds umami depth without making the salmon taste Asian.
8. Food Safety Guide for Preserved Salmon
Food safety is not an optional chapter — it is the most important section of this entire guide. Improperly preserved fish can harbor dangerous bacteria, including Clostridium botulinum (which causes botulism), Listeria monocytogenes, and Staphylococcus aureus. Following proper techniques eliminates these risks. Ignoring them can be genuinely dangerous.
Botulism Prevention in Smoking & Curing
Botulism is the primary food safety concern in salmon preservation. Clostridium botulinum spores are naturally present in soil, water, and the intestinal tracts of fish. They thrive in low-oxygen, low-acid, moist environments — exactly the conditions created inside a piece of smoked or cured salmon. Preventing botulism requires understanding and applying at least one of the following barriers:
Temperature
Hot smoking: Reaching 145°F internal temperature destroys active botulinum bacteria. However, heat alone does not destroy spores — which is why hot-smoked salmon still needs refrigeration.
Pressure canning: 240°F (10 PSI) for 100 minutes destroys both bacteria and spores, making canned salmon truly shelf-stable.
Salt Concentration
Salt concentrations above 3.5% in the water phase of the fish inhibit botulinum growth. This is why a proper brine or dry cure is essential before cold smoking. Without adequate salt, cold-smoked salmon becomes a high-risk product.
Refrigeration
Keeping preserved salmon at 38°F (3°C) or below slows bacterial growth dramatically. All smoked and cured salmon (except properly pressure-canned) must be refrigerated. Botulinum does not grow below 38°F.
Curing Salt (Nitrite)
Prague Powder #1 (sodium nitrite) provides an additional layer of botulism protection, particularly important for cold-smoked products. Used at 1 teaspoon per 5 pounds of fish, it is the standard commercial safety measure.
The Multiple-Barrier Approach
Professional fish smokers use a multiple-barrier approach: they combine adequate salt, proper temperature, curing salt, and refrigeration. No single barrier is relied upon alone. For home preservation, this means:
- Always brine or dry-cure before smoking (salt barrier)
- Hot-smoke to at least 145°F internal temperature (heat barrier)
- Use curing salt for cold-smoked products (nitrite barrier)
- Refrigerate all finished products immediately (temperature barrier)
- Vacuum-seal to minimize surface bacterial exposure
Safe Internal Temperatures
| Product | Minimum Internal Temperature | Notes |
|---|---|---|
| Hot-smoked salmon | 145°F (63°C) | Measured at the thickest point. Use an instant-read thermometer. |
| Salmon jerky | 160°F (71°C) | USDA recommendation for dried fish. Reach this temp before or during dehydration. |
| Canned salmon | 240°F (116°C) | Achieved through pressure canning at 10–15 PSI for 100 minutes. |
| Cold-smoked salmon | Below 80°F during smoking | Not a cooking step. Safety relies on salt cure, not temperature. Must be refrigerated. |
| Gravlax / lox | Not heated | Safety relies on salt concentration and refrigeration. Always keep below 38°F. |
Storage Times by Preservation Method
| Preserved Product | Room Temperature | Refrigerated (38°F) | Frozen (0°F) |
|---|---|---|---|
| Hot-smoked salmon | 2 hours max, then refrigerate | 7–10 days | 2–3 months (vacuum-sealed) |
| Cold-smoked salmon | Not safe at room temperature | 2–3 weeks (vacuum-sealed) | 2–3 months (vacuum-sealed) |
| Gravlax | Not safe at room temperature | 5–7 days (wrapped) | 1–2 months |
| Salmon jerky | 1–2 weeks (airtight container) | 1 month | 3–6 months |
| Canned salmon | 1–2 years (cool, dark place) | N/A (shelf-stable) | N/A (shelf-stable) |
| Salt-cured salmon (heavy cure) | Not recommended | 2–4 weeks | 3–6 months |
When to Discard: Signs of Spoilage
Even properly preserved salmon can spoil if storage conditions are not maintained. Trust your senses — and when in doubt, throw it out. No preserved salmon is worth a foodborne illness.
- Smell: Fresh preserved salmon should smell smoky, briny, or herbal depending on the method. Any sour, ammonia-like, or "off" odors indicate spoilage. Smoked salmon should smell like smoke, not like fish.
- Texture: Sliminess on the surface is a clear warning sign. Properly preserved salmon should feel dry or slightly oily, never slimy. If cold-smoked salmon or gravlax develops a sticky, viscous film, discard it.
- Color: Fading is normal over time, but green, blue, or black spots indicate mold. Gray or brown discoloration at the surface may indicate oxidation. Any iridescent or rainbow sheen on smoked salmon is actually normal (caused by light diffraction on the protein surface) and is not a sign of spoilage.
- Bulging cans or lids: If a canned salmon lid is bulging, domed, or hisses when opened, discard the entire jar immediately without tasting. This is the hallmark of botulinum contamination. Do not taste, do not save — dispose of it.
- Mold: Any visible mold on smoked, cured, or jerky salmon means discarding the entire piece. Unlike hard cheeses, you cannot simply cut mold off fish — the mold filaments penetrate deep into the flesh.
Refrigeration Is Non-Negotiable
With the sole exception of properly pressure-canned salmon and fully dried jerky, all preserved salmon products must be refrigerated at all times. Do not leave smoked salmon, gravlax, or cold-smoked salmon at room temperature for more than 2 hours (1 hour if the ambient temperature exceeds 90°F). When serving at a party or gathering, keep preserved salmon on ice or return it to the refrigerator frequently.
Freezing Preserved Salmon
Vacuum sealing and freezing is the best way to extend the life of any preserved salmon product. Vacuum sealing removes oxygen (slowing oxidation and bacterial growth) while the freezer temperature halts all microbial activity. For best results:
- Vacuum-seal in portion sizes you will use at one time. Once thawed, do not refreeze.
- Label each package with the date, species, and preservation method.
- Store at 0°F (−18°C) or below. The colder, the better.
- Before refrigerator thawing, open or remove vacuum packaging. Place the salmon in a shallow covered container, keep it refrigerated, and follow package or processor instructions. Never thaw at room temperature.
- Use frozen preserved salmon within the timeframes listed in the storage table above for best quality.
9. Quick-Reference: Which Method for Which Species?
Choosing the right preservation method for each species of wild salmon is the key to getting the best results. This decision table summarizes the ideal pairings based on fat content, texture, and flavor characteristics.
| Species | Hot Smoking | Cold Smoking | Gravlax | Jerky | Canning |
|---|---|---|---|---|---|
| King (Chinook) | Exceptional | Exceptional | Exceptional | Not recommended | Good (rich) |
| Sockeye (Red) | Excellent | Excellent | Excellent | Not recommended | Very good |
| Coho (Silver) | Very good | Good | Very good | Good | Good |
| Pink (Humpy) | Fair (dries easily) | Not recommended | Fair | Excellent | Excellent |
| Keta (Chum) | Good | Fair | Fair | Excellent | Excellent |
The simple rule: Fat-rich species (king and sockeye) are best for smoking and curing. Lean species (pink and keta) are best for jerky and canning. Coho is the versatile middle ground that works well with every method.
10. Preservation Method Comparison
Not sure which preservation method to try first? This comprehensive comparison breaks down every factor to help you choose based on your equipment, time, experience level, and goals.
| Method | Time Required | Equipment | Shelf Life | Difficulty | Best Species |
|---|---|---|---|---|---|
| Hot Smoking | 12–16 hrs total (brine + smoke) | Smoker, wood chips, thermometer | 10 days fridge, 3 mo frozen | Beginner-friendly | King, sockeye |
| Cold Smoking | 2–4 days total (cure + smoke + rest) | Cold smoke generator, smoker, curing salt | 3 weeks fridge, 3 mo frozen | Intermediate | King, sockeye |
| Gravlax | 48–72 hrs (hands-off cure) | None (salt, sugar, dill, plastic wrap) | 7 days fridge, 2 mo frozen | Easiest | King, sockeye, coho |
| Jerky | 12–20 hrs total (marinate + dry) | Dehydrator or oven | 2 wks room temp, 6 mo frozen | Beginner-friendly | Pink, keta, coho |
| Pressure Canning | 3–4 hrs (prep + processing) | Pressure canner, mason jars, lids | 1–2 years shelf-stable | Intermediate | Pink, keta, sockeye |
| Salt Cure (heavy) | 24–72 hrs | None (salt, sugar, aromatics) | 4 weeks fridge | Easy | Any (varies by cure) |
11. The Bristol Bay Tradition
Bristol Bay, Alaska, is home to the largest wild sockeye salmon run on Earth. Every summer, tens of millions of sockeye surge up the rivers feeding into this vast bay, and fishermen from across the state converge on its waters to participate in one of the most productive and carefully managed fisheries in the world. It is also where some of the oldest and most enduring salmon preservation traditions in North America continue to this day.
For generations, the families who fish Bristol Bay have preserved their catch using the same fundamental methods described in this guide. After a day on the water, fishermen would bring their catch ashore and begin the process of splitting, salting, and smoking that transformed fresh sockeye into food that would last through the long Alaska winter. Smokehouses dot the landscape around Dillingham, Naknek, and King Salmon — small, weathered structures where fish hang on wooden racks over smoldering alder fires, just as they have for centuries.
The Yup’ik people, the indigenous inhabitants of the Bristol Bay region, are the original masters of salmon preservation. Their techniques — developed over thousands of years of careful observation and refinement — include methods for drying, smoking, fermenting, and freezing salmon that are still practiced today. Many modern smoking and curing techniques trace their origins to these indigenous innovations.
When you smoke, cure, or can wild salmon at home, you are participating in this tradition. You are connecting with the same fundamental human instinct that drove the first people of the Pacific to find ways to make the summer’s abundance last through the winter. The fish may arrive at your door flash-frozen and vacuum-sealed instead of pulled from a net on the Nushagak River, but the craft of transforming it into something preserved and extraordinary is timeless.
Popsie Fish Co’s connection: Every piece of wild salmon we ship comes from these same Bristol Bay waters, caught by independent fishermen using sustainable methods. When you use our salmon for your smoking, curing, and preserving projects, you are working with the same exceptional fish that Bristol Bay families have been preserving for generations.
12. Preservation Recipe Cards
Here are six complete preservation recipes — one for each major method covered in this guide. Each uses a specific species of wild Pacific salmon chosen to highlight that method’s strengths.
Alder-Smoked King Salmon
King Salmon
Brine
- 4 cups cold water
- 1/3 cup kosher salt
- 1/3 cup dark brown sugar
- 2 tablespoons soy sauce
- 1 teaspoon black peppercorns
- 2 bay leaves, 2 garlic cloves smashed
Instructions
- Dissolve salt and sugar in water. Add remaining brine ingredients.
- Submerge 2 lbs king salmon fillets (skin on). Refrigerate 10–12 hours.
- Rinse, pat dry. Form pellicle on wire rack in fridge for 3–4 hours.
- Smoke with alder wood: 1 hour at 150°F, then 2 hours at 225°F.
- Internal temp: 145°F. Rest 30 minutes before serving or storing.
Classic Dill Gravlax
Sockeye Salmon
Cure
- 1/4 cup kosher salt
- 1/4 cup granulated sugar
- 1 tablespoon cracked black pepper
- 2 cups fresh dill (1 large bunch)
- Zest of 1 lemon
Instructions
- Mix salt, sugar, and pepper. Spread half the dill on plastic wrap.
- Place 1.5 lb sockeye fillet skin-down on dill. Pack cure on flesh, top with dill.
- Wrap tightly. Weight with 2–3 lbs. Refrigerate 48–72 hours, flipping daily.
- Unwrap, scrape off cure and dill. Do not rinse. Pat dry.
- Slice paper-thin on a bias. Serve with rye bread and crème fraîche.
Teriyaki Pink Salmon Jerky
Pink Salmon
Marinade
- 1/2 cup soy sauce
- 1/4 cup brown sugar
- 2 tablespoons rice vinegar
- 1 tablespoon sesame oil
- 2 garlic cloves, minced
- 1 teaspoon fresh ginger, grated
Instructions
- Remove skin. Cut 2 lbs pink salmon into 1/4-inch strips with the grain.
- Combine marinade. Submerge strips. Refrigerate 8–12 hours.
- Drain, pat very dry with paper towels.
- Dehydrate at 150°F for 6–8 hours until strips bend and crack but do not snap.
- Cool completely. Store in airtight container. Keeps 2 weeks at room temp.
Cold-Smoked Sockeye Lox
Sockeye Salmon
Cure
- 1 cup kosher salt
- 1/2 cup brown sugar
- 1 teaspoon Prague Powder #1
- 1 tablespoon cracked black pepper
Instructions
- Mix cure. Pack over 2 lb sockeye fillet. Wrap, weight, refrigerate 24 hours.
- Rinse thoroughly for 2 minutes. Pat dry.
- Form pellicle: wire rack in fridge, uncovered, 12–24 hours.
- Cold-smoke with alder at below 80°F for 14–18 hours.
- Wrap tightly, refrigerate overnight. Slice thin on bias to serve.
Pressure-Canned Pink Salmon
Pink Salmon
Equipment
- Pressure canner (weighted or dial gauge)
- Half-pint wide-mouth mason jars
- New canning lids and rings
- Canning salt
Instructions
- Cut 4 lbs pink salmon into jar-sized chunks. Remove dark bloodline.
- Raw-pack firmly into sterilized half-pint jars, 1-inch headspace.
- Add 1/2 teaspoon canning salt per jar. Do not add liquid.
- Wipe rims. Seal with lids and rings (finger-tight).
- Process at 10 PSI for 100 minutes. Cool naturally in canner.
- Check seals after 24 hours. Label and store in cool, dark place up to 2 years.
Citrus-Cured Coho Salmon
Coho Salmon
Cure
- 3 tablespoons kosher salt
- 3 tablespoons granulated sugar
- Zest of 2 oranges and 1 lime
- 1 teaspoon coriander seeds, lightly crushed
- 1/2 teaspoon pink peppercorns
- 1 cup fresh cilantro leaves
Instructions
- Mix salt, sugar, citrus zest, coriander, and peppercorns.
- Layer cilantro on plastic wrap. Place 1.5 lb coho fillet skin-down.
- Pack cure mixture over flesh. Top with remaining cilantro. Wrap tightly.
- Weight and refrigerate 48 hours, flipping once at 24 hours.
- Unwrap, gently scrape cure. Slice thin. Serve with avocado and radish.
13. Frequently Asked Questions
Absolutely. Flash-frozen wild salmon is ideal for smoking because the freezing process does not meaningfully affect the texture or flavor of the finished product. In fact, many professional smokehouses work exclusively with frozen fish. Before refrigerator thawing, open or remove the vacuum packaging. Place the salmon in a shallow covered container, keep it refrigerated, and follow package or processor instructions. Pat it dry before proceeding with your brine. Never thaw at room temperature.
The white substance that beads on smoked salmon is albumin, a protein that coagulates and gets pushed to the surface when the fish is heated too quickly. To minimize it: (1) form a proper pellicle by air-drying the brined salmon for 2–4 hours before smoking, (2) start at a lower temperature (150°F) for the first hour, and (3) increase the temperature gradually rather than all at once. A brine with some vinegar or citrus (1 tablespoon per quart) can also help by slightly lowering the surface pH, which reduces albumin coagulation.
Yes, when made properly with adequate salt and kept refrigerated. The salt-sugar cure in gravlax inhibits bacterial growth and draws moisture from the fish, creating an environment that is hostile to pathogens. For additional safety, you can use salmon that was previously frozen at -4°F (-20°C) for 7 days, which kills any parasites that may be present. All commercially frozen salmon (including Popsie’s flash-frozen products) meets this standard. Gravlax should always be kept refrigerated at 38°F or below and consumed within 5–7 days of curing.
These three products are often confused but they are distinct preparations. Lox is salmon cured in a salt brine only — no smoke, no sugar, just salt. It has a very salty, silky texture. Smoked salmon (usually cold-smoked, sometimes called Nova) is cured in salt and then exposed to cool smoke for 12–24 hours, adding a smoky flavor while maintaining a raw-like texture. Gravlax is cured with a mixture of salt, sugar, and fresh dill — no smoke involved. Each has a different flavor profile, but all three are served thinly sliced and uncooked.
You can, but we do not recommend it for food safety reasons. Curing salt (Prague Powder #1, which contains sodium nitrite) provides an important additional barrier against botulism in cold-smoked products. Without it, you are relying solely on your salt concentration and refrigeration to prevent bacterial growth. If you choose to cold-smoke without curing salt, use a heavier initial salt cure (increase kosher salt by 25%), keep the smoking time under 14 hours, consume the product within 1 week, and maintain strict refrigeration at all times.
Hot-smoked salmon keeps for 7–10 days in the refrigerator when properly stored (in an airtight container or tightly wrapped). Cold-smoked salmon lasts 2–3 weeks refrigerated when vacuum-sealed. Once opened, both should be consumed within 5–7 days. For longer storage, vacuum-seal and freeze for up to 3 months. Always store smoked salmon at 38°F or below, and never leave it at room temperature for more than 2 hours.
Alder is the traditional and most widely recommended wood for smoking salmon. It produces a mild, slightly sweet smoke that complements the fish without overpowering it. Apple and cherry are excellent alternatives that add a touch of fruitiness. For a bolder flavor, blend hickory with alder (50/50 ratio). Avoid mesquite, which is far too aggressive for fish. The choice of wood is largely a matter of personal preference, so experiment with small batches to find your favorite combination.
Yes, with some modifications. For a charcoal grill, set up indirect heat by placing lit coals on one side and the salmon on the other. Add soaked wood chips to the coals for smoke. For a gas grill, place a foil packet of dry wood chips over one burner set to low, and place the salmon on the unlit side. The challenge with grills is maintaining consistent low temperatures (200–225°F) for 2–3 hours. A grill thermometer is essential. Close the vents partially to keep temperatures down and smoke in.
Over-salting usually comes from one of three causes: (1) brining too long — thin fillets (under 3/4 inch) should brine no more than 6–8 hours in a standard brine; (2) using the wrong salt measurement — Morton’s kosher salt is much denser than Diamond Crystal, so you need 25% less; or (3) skipping the post-brine rinse. Always rinse each fillet under cold running water for 30 seconds after brining. For a simple test, cut a small piece from the thinnest edge and cook it in a pan — if it tastes too salty, soak the remaining fillets in plain cold water for 30–60 minutes before drying and smoking.
No. Never use a water bath canner for fish. Fish is a low-acid food that requires pressure canning to reach the 240°F internal temperature needed to destroy Clostridium botulinum spores. A boiling water bath only reaches 212°F, which is not hot enough to ensure safety. This is not a matter of preference or tradition — it is a firm food safety requirement backed by the USDA, the National Center for Home Food Preservation, and every credible canning authority. Always use a tested, calibrated pressure canner for fish.
Start with the Freshest Wild Salmon
Every great preservation project starts with great fish. Popsie’s wild Alaska salmon is flash-frozen at peak freshness and shipped directly to your door — the perfect canvas for smoking, curing, gravlax, and jerky.