
Kitchen Guide
The Complete Seafood Kitchen: Tools, Techniques & Troubleshooting
The tools, the pantry, the timing. Everything you need to make wild seafood a weeknight default, not a special occasion.
Key Takeaways
- You only need six essential tools to cook restaurant-quality fish at home — starting with a good thermometer and a flexible fillet knife.
- The single biggest cause of overcooked fish is skipping the instant-read thermometer. Target temperatures vary by species from 120°F to 145°F.
- Fish sticks to pans for one reason: the protein has not released yet. A properly heated pan with oil will give you a clean release every time.
- Knife skills for seafood are different from meat — lighter pressure, longer strokes, and letting the blade flex along the bones.
- Most seafood cooking problems have a single, simple fix. This guide covers the eight most common issues and how to solve each one.
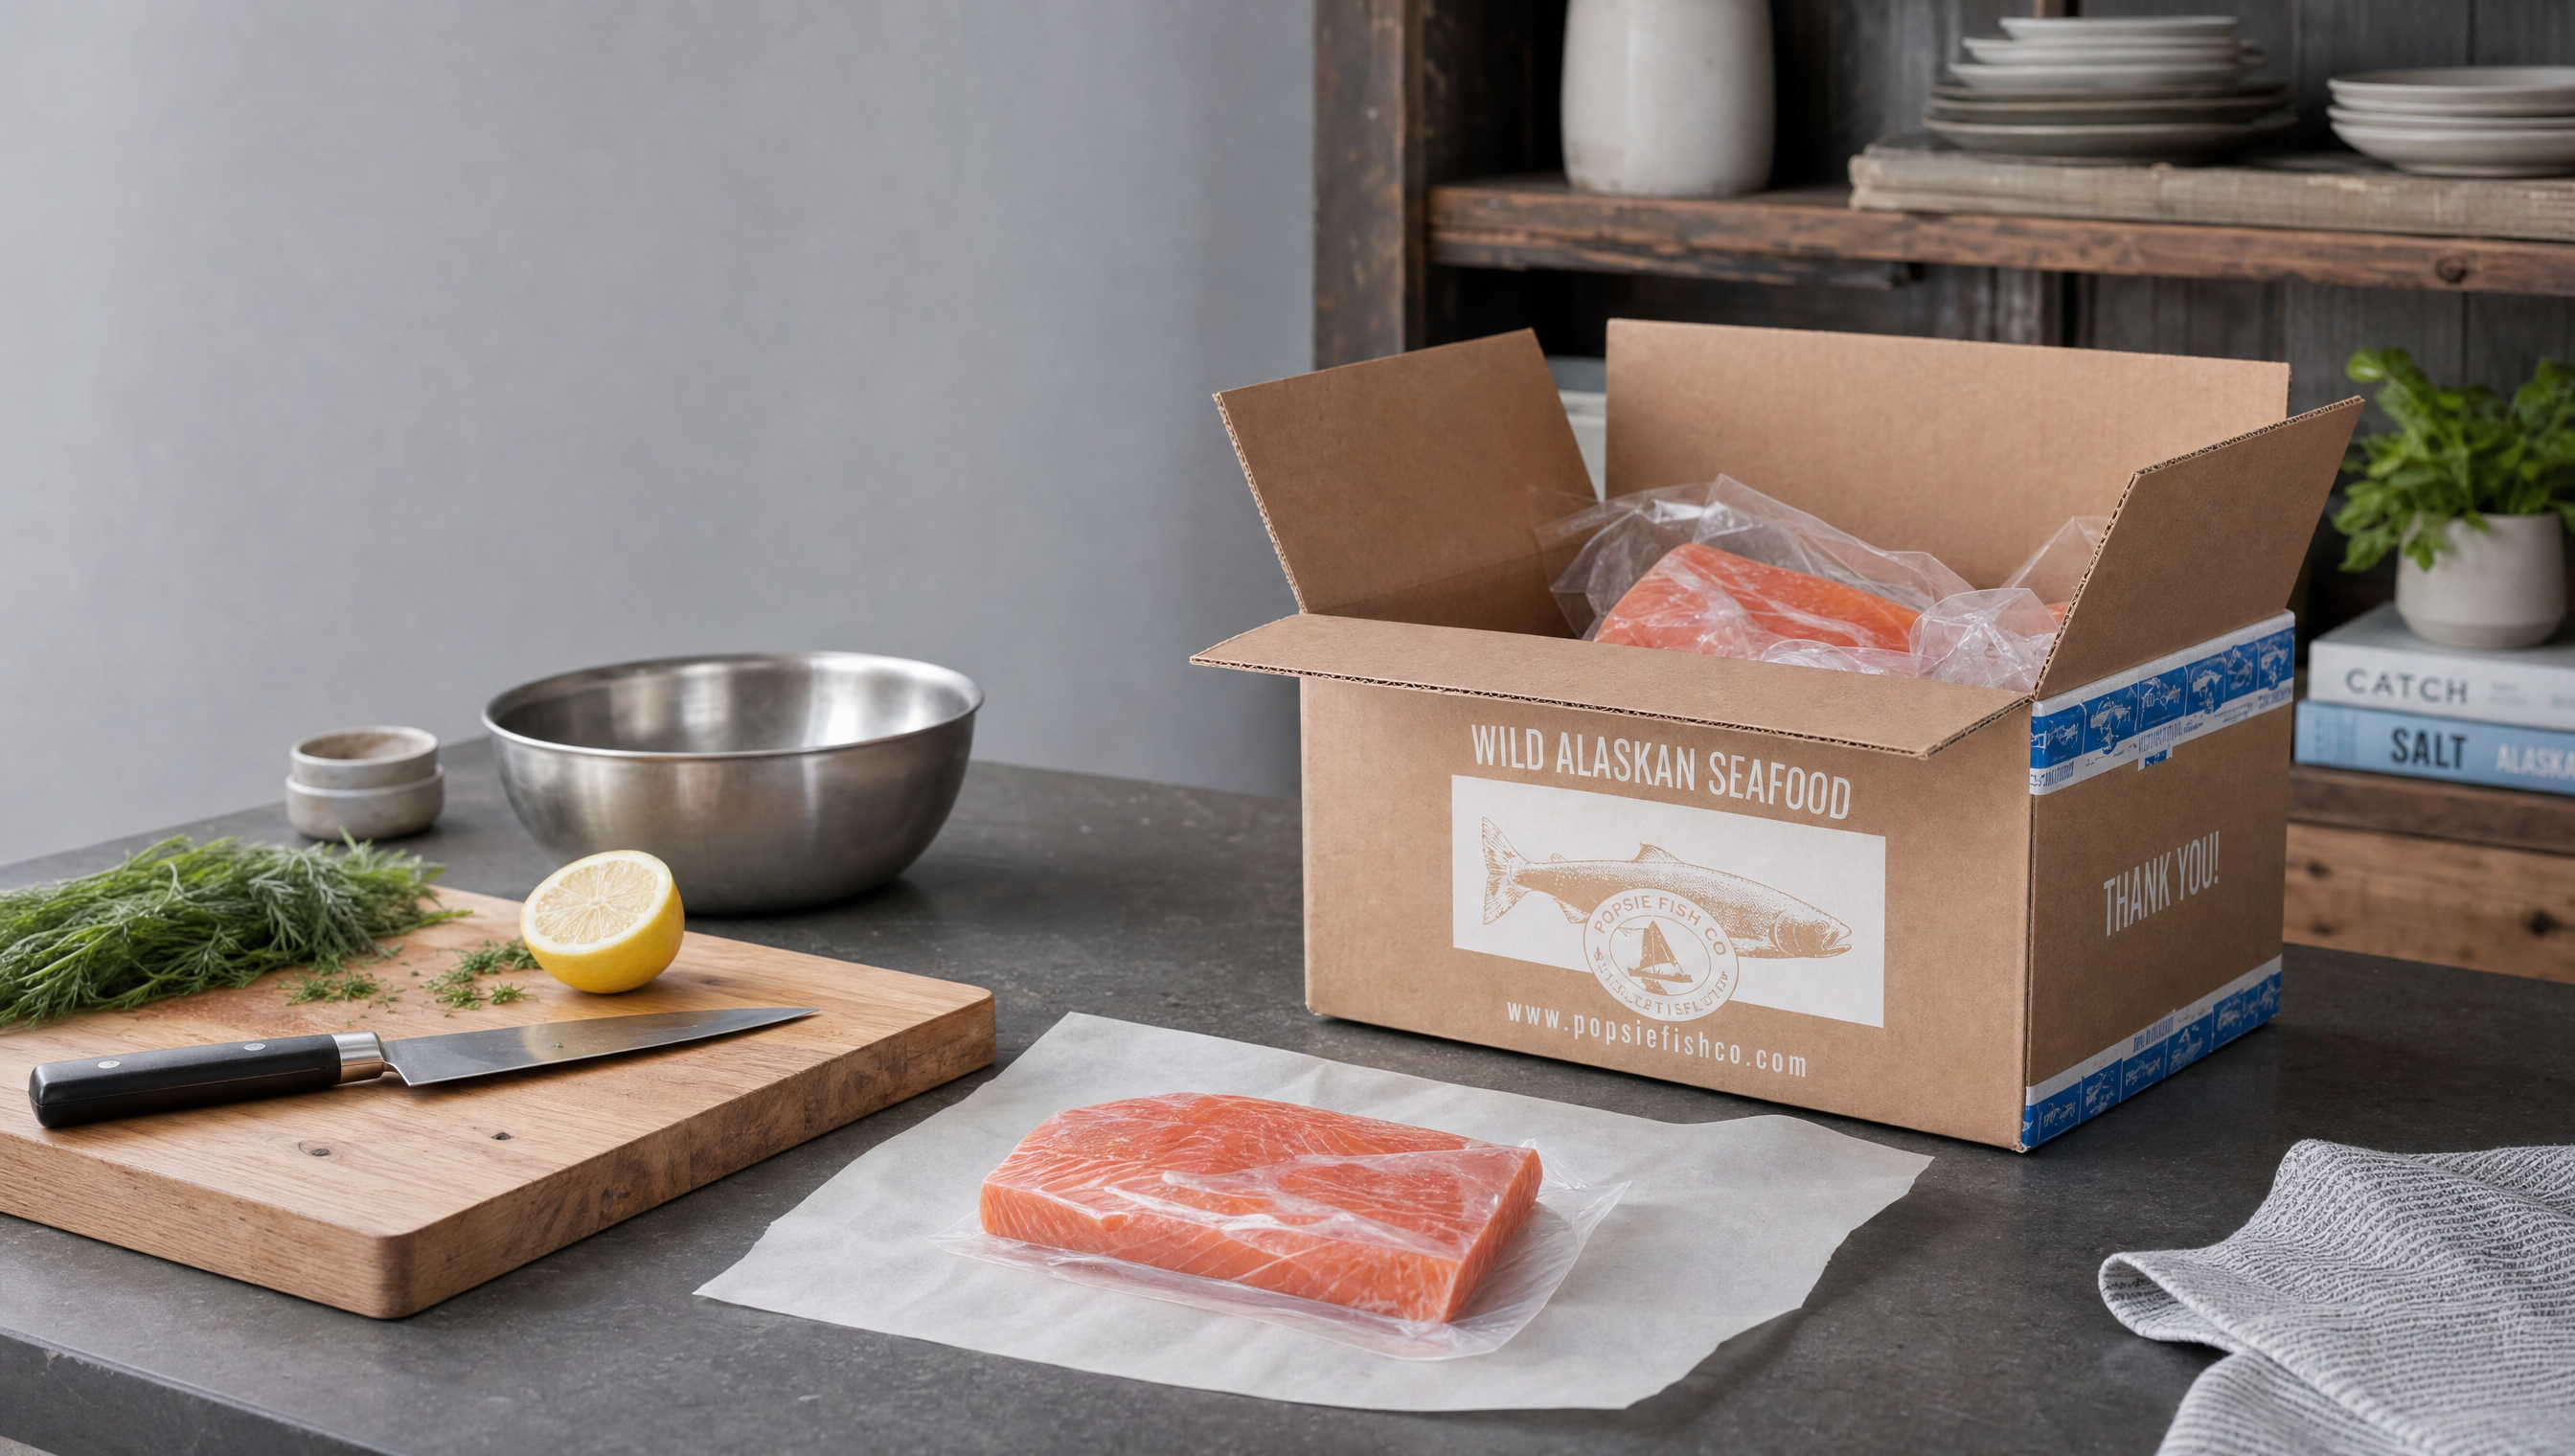
- Wild Alaskan fish from Popsie arrives flash-frozen at peak freshness, giving you a better starting point than most "fresh" fish at the counter.
Table of Contents
1. Essential Seafood Kitchen Tools
You do not need a professional kitchen to cook incredible fish. But the right tools make the difference between struggling through a recipe and executing it with ease. Here is every tool a home cook should consider, organized by priority so you can build your seafood kitchen over time.
The Must-Haves: Six Tools You Need Today
These are the non-negotiable essentials. If you cook fish even once a month, each of these tools will pay for itself in better results, less wasted food, and more enjoyable cooking sessions.
Instant-Read Thermometer
What it does: Gives you an accurate internal temperature in 2–3 seconds, removing all guesswork from doneness.
Why you need it: Fish has a narrow window between perfectly cooked and overdone. A thermometer is the only reliable way to hit your target every time. Professional chefs use them constantly.
Flexible Fillet Knife
What it does: The thin, flexible blade follows the contours of the fish skeleton, letting you separate flesh from bone with minimal waste.
Why you need it: A chef knife is too rigid for filleting. You will lose a significant amount of fish trying to work around bones and skin with the wrong blade.
Fish Spatula (Slotted Turner)
What it does: The thin, angled, slotted blade slides under delicate fillets without breaking them. Slots let excess oil drain away.
Why you need it: Regular spatulas are too thick and rigid. They break apart fish when you try to flip. A fish spatula is designed to support the entire fillet during the turn.
Cast Iron or Non-Stick Skillet
What it does: Provides an even, reliable cooking surface for searing, pan-roasting, and sauteing fish fillets and steaks.
Why you need it: Fish requires either a well-seasoned surface or a non-stick coating to release cleanly. A 12-inch skillet handles most fillets with room to spare.
Heavy-Duty Sheet Pans
What it does: Provides flat, warp-resistant surface for oven-roasting, broiling, and sheet-pan dinners with fish and vegetables.
Why you need it: Thin sheet pans warp at high temperatures, creating hot spots that cook fish unevenly. A heavy-gauge pan keeps everything flat and consistent.
Fish Tweezers or Pliers
What it does: Grips and removes pin bones from fillets quickly and cleanly, without tearing the flesh.
Why you need it: Pin bones are the small, flexible bones that run along the center line of salmon and many other species. They need to come out before cooking, and fingers alone will not do the job.
Nice-to-Haves: Level Up Your Cooking
Once you have the basics covered, these tools open up new techniques and make existing ones easier. Add them as your confidence and repertoire grow.
Cedar Planks
What it does: Adds smoky, aromatic flavor to grilled or oven-roasted fish while preventing the fillet from sticking to the grate.
Why it is great: Cedar-planked salmon is one of the easiest impressive dishes you can serve. Soak, season, place, and the plank does the rest.
Fish Basket for Grilling
What it does: Clamps around fish so you can flip it on the grill without it falling apart or dropping through the grates.
Why it is great: Grilling whole fish or delicate fillets becomes stress-free. One flip and everything stays intact.
Kitchen Scale
What it does: Lets you portion fillets precisely for even cooking and accurate recipe execution.
Why it is great: When two fillets weigh the same, they finish at the same time. No more guessing whether one piece needs two extra minutes.
Mandoline Slicer
What it does: Creates paper-thin, uniform slices of vegetables, citrus, and garnishes for seafood platters and ceviches.
Why it is great: Uniform slices cook evenly and present beautifully. Essential for dishes where raw fish meets thinly sliced accompaniments.
Specialty Equipment: For the Dedicated Seafood Cook
These tools are investments for home cooks who want to expand beyond basic pan-searing and oven-roasting into smoking, precision cooking, and poaching.
Smoker (Electric or Pellet)
What it does: Infuses fish with real wood smoke at controlled low temperatures, producing smoked salmon, trout, and sablefish at home.
Why it is worth it: Hot-smoked wild salmon is one of the great culinary experiences. Once you taste your own, store-bought will never compare. Also excellent for smoking other proteins and vegetables.
Sous Vide Immersion Circulator
What it does: Heats water to a precise, constant temperature so you can cook fish to the exact degree of doneness you want — edge to edge.
Why it is worth it: Sous vide is the single most foolproof way to cook fish. It is virtually impossible to overcook because the water temperature equals your target temperature. The result is silky, even doneness throughout.
Fish Poacher
What it does: An elongated pan with a rack and lid designed specifically for poaching whole fish or large fillets in court-bouillon, stock, or wine.
Why it is worth it: Poaching is one of the gentlest, healthiest cooking methods for delicate white fish. A dedicated poacher makes the process effortless and gives you a stunning whole-fish presentation for dinner parties.
Start with the thermometer. If you buy only one thing from this list, make it an instant-read thermometer. It will improve every piece of fish you cook, immediately. Everything else is about technique and convenience — the thermometer is about accuracy.
2. Choosing the Right Cookware for Fish
The pan you choose matters more for fish than for almost any other protein. Fish is delicate, lean, and prone to sticking. Picking the right surface for the right species and technique can mean the difference between a flawless sear and a fillet that falls apart on the spatula.
Cast Iron vs. Stainless Steel vs. Non-Stick
Each material has strengths and tradeoffs. Here is when to reach for each one:
| Cookware | Best For | Avoid For | Key Technique |
|---|---|---|---|
| Cast Iron | Skin-on salmon, halibut steaks, blackened fish | Very thin or delicate fillets (sole, flounder) | Preheat 3–5 min over medium-high, add oil when it shimmers |
| Stainless Steel | Pan sauces, deglazing, searing thicker cuts | Skin-on fillets (unless very confident with technique) | Oil the fish, not the pan. Place presentation-side down first. |
| Non-Stick | Thin fillets, beginners, low-fat cooking | High-heat searing (damages coating), building fond for sauces | Medium heat only, minimal oil, gentle flip with fish spatula |
| Carbon Steel | High-heat searing, experienced cooks, wok-style stir-fry | Acidic sauces (strips seasoning), beginners | Season like cast iron. Lighter and more responsive to heat changes. |
Why Fish Sticks to the Pan (And How to Prevent It)
Fish sticking is the most common frustration home cooks face. The science behind it is straightforward: raw protein bonds with metal at the microscopic level. When you heat a protein on a metal surface, the protein molecules form chemical bonds with the metal. As the fish cooks, those bonds break naturally and the fillet releases on its own.
The mistake most people make is trying to flip too early, before the bonds have broken. Here is the process that works every time:
- Dry the surface. Pat the fish completely dry with paper towels. Moisture creates steam, which prevents proper searing and encourages sticking.
- Heat the pan first. Place your empty pan over medium-high heat for 2–4 minutes. The pan should be fully hot before you add anything.
- Add oil and wait. Add a high-smoke-point oil (avocado, grapeseed, or refined coconut). Wait until you see the first wisp of smoke.
- Place the fish gently. Lay the fillet skin-side down (or presentation-side down for skinless fillets), placing it away from you to avoid oil splatter.
- Do not touch it. This is the critical step. Leave the fish alone for 3–4 minutes. It will release when it is ready. If it resists when you test the edge, give it another 30 seconds.
- Flip once. When the edges are opaque and the fillet lifts easily, flip once and finish cooking. Most fillets need only 1–2 minutes on the second side.
The 80/20 Rule of Fish Cooking: Cook fish 80% on the first side and only 20% on the second side. This applies whether you are searing, grilling, or broiling. The first side develops color and flavor. The second side just finishes the center.
Sheet Pan Selection for Oven Cooking
Oven-roasting on sheet pans is one of the easiest ways to cook fish, especially for weeknight dinners. The right pan makes a measurable difference:
- Use heavy-gauge aluminum (18-gauge). Thin pans warp at 425°F and above, creating uneven contact. Warped pans mean unevenly cooked fish.
- Choose light-colored pans over dark. Dark, non-stick sheet pans absorb and radiate more heat, which can overcook the bottom of delicate fillets before the top is done.
- Line with parchment paper, not foil. Parchment prevents sticking without reacting with acidic marinades. Foil can react with lemon juice and vinegar, creating off-flavors and discoloring the fish.
- Use a wire rack for crispy skin. Elevating the fish on an oven-safe wire rack allows hot air to circulate underneath, giving you crispy skin on all sides without flipping.
- Do not crowd the pan. Leave at least 2 inches between fillets. Crowding traps steam and prevents browning — you get pale, steamed fish instead of golden, roasted fish.
The sheet pan dinner method: Place dense vegetables (potatoes, carrots, fennel) on the pan first. Roast at 425°F for 15 minutes. Then add your fish fillets on top of or next to the vegetables and roast for another 10–14 minutes. Everything finishes at the same time.
3. Knife Skills for Seafood
Working with fish requires a fundamentally different approach than cutting meat or vegetables. Fish flesh is softer, the bones are finer, and the margin for error is smaller. The good news: once you learn the basic motions, they apply to almost every species you will encounter.
How to Fillet a Whole Salmon
Filleting a whole salmon is one of the most satisfying skills a home cook can master. A whole fish often costs less per pound than pre-cut fillets, and you get the bones and head for making stock. Here is the complete process:
- Set up your workspace. Place the salmon on a large cutting board with the head facing your dominant hand. Have a clean sheet pan nearby for finished fillets and a bowl for trim and bones. Make sure your fillet knife is sharp — a dull blade tears instead of cuts.
- Remove the head. Lift the pectoral fin and cut diagonally behind it and the gill plate on both sides, angling the blade toward the head to preserve as much flesh as possible. Cut through the spine. Set the head aside for stock.
- Open the belly. Turn the fish so the belly faces you. Insert the tip of your fillet knife into the belly cavity near the tail. Using a shallow, controlled stroke, cut along the belly toward the head end. Keep the blade shallow to avoid puncturing the organs underneath.
- Cut along the backbone. Starting at the head end, insert your blade just above the spine. With long, smooth strokes, glide the knife along the rib cage from head to tail. Let the blade flex and follow the bones. Use the spine as your guide rail — you should feel the blade riding along the vertebrae.
- Free the fillet from the ribs. As you work down the rib cage, use short, gentle strokes to separate the flesh from each rib bone. Keep the blade angled slightly toward the bones (not the flesh) to minimize waste. The fillet will peel away as you go.
- Cut through the tail. When you reach the tail, cut through to separate the fillet completely. Lay it skin-side down on the sheet pan. Flip the fish and repeat steps 4 through 6 on the other side.
- Trim the belly flap. Each fillet will have a thin belly section. Trim the thinnest part (where there is more fat than flesh) for stock, smoking, or crispy fish skin snacks. The remaining belly is excellent eating.
- Remove the rib bones. Lay the fillet skin-side down. Using the tip of your fillet knife, slide the blade under the rib bones at a shallow angle. Glide along the bones to cut them free in one piece. A thin strip of belly flesh will come with them — that is normal.
How to Remove Pin Bones
Pin bones are the small, flexible intramuscular bones that run in a line along the center of a fillet from head to about two-thirds of the way to the tail. They are present in salmon, trout, cod, halibut, and most other fillet fish. Removing them is essential before cooking.
- Feel for the bones. Run your fingertips lightly along the center line of the fillet from the thick end toward the thin end. You will feel the pin bones as small, hard bumps protruding slightly from the flesh. There are typically 20–30 per fillet.
- Create a slight arch. Drape the fillet over an inverted bowl or your forearm (skin-side down). This curves the flesh outward and pushes the pin bone tips up, making them easier to grip.
- Grip and pull at an angle. Using fish tweezers or flat-nosed pliers, grip each bone firmly near the base. Pull slowly in the direction the bone naturally points (toward the head end, at a slight angle). Pulling straight up tears the flesh; pulling at the bone angle slides it out cleanly.
- Work methodically. Start at the thick end and move toward the thin end. After removing all the bones, run your fingers along the line one more time to check for any you missed.
Popsie Advantage: All Popsie fillets are trimmed and pin-boned before flash-freezing. But if you buy a whole fish or order from a fishmonger, knowing this skill saves you a trip back to the counter — and prevents an unpleasant surprise at the dinner table.
How to Skin a Fillet
Many dishes call for skinless fillets, and removing skin at home gives you the option of cooking the skin separately into crispy chips or saving it for stock.
- Start at the tail end. Place the fillet skin-side down. At the very tail end, cut a small flap of flesh away from the skin — just enough to give you a grip on the skin.
- Grip the skin firmly. With your non-dominant hand, grasp the exposed skin flap. A paper towel helps you maintain grip since raw fish skin is slippery.
- Saw with a slight angle. Holding the blade at a slight downward angle against the skin, use a gentle back-and-forth sawing motion to slide the blade between the flesh and skin. Keep the blade pressed against the skin, not angled into the flesh.
- Let the knife do the work. Pull the skin taut with one hand while the blade moves forward with the other. The flesh should separate cleanly, leaving almost no flesh on the skin. If you see a thick layer of flesh remaining on the skin, angle the blade down more.
How to Portion Fillets for Even Cooking
Uneven portions are one of the top reasons home cooks end up with some pieces overcooked and others underdone. Proper portioning solves this instantly.
- Standard portion size: 6 ounces raw weight for a dinner serving, 4 ounces for lunch or lighter meals. Use a kitchen scale for accuracy.
- Match thickness, not just weight. Two 6-ounce portions that are different thicknesses will cook at different rates. Cut from the same section of the fillet when possible.
- Tuck thin ends under. The tail section of a fillet is much thinner than the center. Fold the thin end under itself to double its thickness and create a more uniform shape.
- Cut at an angle for larger-looking portions. Instead of cutting straight down, cut at a 45-degree angle (called a "bias cut") to create wider, more elegant portions that plate beautifully.
- Rest portions at room temperature 15–20 minutes before cooking. Cold-from-the-fridge fish shocks a hot pan, causing uneven cooking. Letting it temper slightly gives you more consistent results.
Knife Care and Sharpening Basics
A sharp knife is safer and more effective than a dull one. With fish, sharpness matters even more because dull blades crush and tear the delicate flesh instead of cutting cleanly.
- Hone before every use. A honing steel realigns the edge without removing metal. Five to six strokes per side at a 15–20 degree angle before each session keeps the edge straight.
- Sharpen every 3–6 months. Use a whetstone (1000/3000 grit combination) or a professional sharpening service. Electric pull-through sharpeners remove too much metal and can damage fine blades.
- Hand wash only. Never put fish knives in the dishwasher. The detergent is abrasive, and contact with other utensils damages the edge. Wash with soap and water, dry immediately.
- Store on a magnetic strip or in a blade guard. Tossing knives in a drawer lets them bang against other tools, dulling and chipping the edge. A magnetic wall strip is the best option for most kitchens.
Test sharpness with paper. Hold a single sheet of printer paper by the top edge. Slice downward through it with your knife. A sharp blade will cut through cleanly with no resistance. If it tears or catches, the blade needs sharpening.
4. Mastering Internal Temperatures
Temperature is the single most important variable in cooking fish. Get it right and the fish is juicy, flaky, and perfectly done. Get it wrong by even 10 degrees and you are looking at dry, chalky protein. An instant-read thermometer transforms fish cooking from guesswork into precision.
Why Temperature Matters More Than Time
Recipe times are estimates based on average conditions. Your actual cooking time depends on the thickness of the fillet, the temperature it started at, the accuracy of your oven or burner, and the specific piece of fish. Two "identical" fillets from the same package can finish minutes apart.
Temperature, on the other hand, is absolute. When the center of your salmon reads 125°F, it is medium-rare regardless of whether it took 8 minutes or 14 minutes to get there. That is why professionals cook to temperature, not to the clock.
Species-Specific Target Temperatures
Different species have different fat contents, collagen structures, and muscle compositions. That means they reach their ideal texture at different internal temperatures. Here are the targets for the most common wild Alaskan species:
Wild Salmon (Sockeye, King, Coho, Pink)
Our recommendation: 120–125°F for the best eating experience. At this temperature, the flesh is silky, moist, and deeply flavorful. The fat has rendered but the protein has not tightened to the point of dryness. King salmon, with its higher fat content, is especially forgiving and stays moist up to 130°F. Sockeye, being leaner, benefits from pulling at 120°F.
The FDA recommends 145°F for food safety. At this temperature, salmon is fully opaque and firm. If you prefer well-done fish or are cooking for immunocompromised individuals, follow the FDA guideline.
Halibut
Halibut is an extremely lean fish with large, firm flakes. It dries out quickly if pushed past 135°F. At 130°F, the center is just translucent and incredibly moist. The thick, dense flesh of halibut holds heat well, so carryover cooking (see below) is a significant factor — pull it 5–8 degrees early.
Pacific Cod
Cod is a mild, delicate white fish that flakes into large, clean sections when properly cooked. Unlike salmon, cod actually benefits from being cooked to a slightly higher temperature because the collagen between its flakes breaks down more completely. At 140°F, the flesh is opaque, moist, and lifts apart beautifully with a fork.
Sablefish (Black Cod)
Sablefish is one of the fattiest, most luxurious fish in the Pacific. Its high oil content means it stays moist across a wider temperature range, but it is at its buttery, melt-in-your-mouth best between 125°F and 130°F. The fat bastes the flesh from within, creating an almost velvety texture that higher temperatures destroy.
The Carryover Cooking Phenomenon
Carryover cooking is the continued rise in internal temperature after you remove food from the heat source. The exterior of the fish is hotter than the interior, and that stored heat continues to conduct inward even on the plate.
For fish, carryover cooking typically adds 5–10°F to the final temperature. The exact amount depends on the thickness of the fillet and how hot the cooking method was:
| Cooking Method | Typical Carryover | Pull Temperature Example (for 125°F target) |
|---|---|---|
| Pan searing (high heat) | 8–10°F | Pull at 115–117°F |
| Oven roasting (400–425°F) | 5–8°F | Pull at 117–120°F |
| Grilling (direct heat) | 8–10°F | Pull at 115–117°F |
| Poaching / steaming | 3–5°F | Pull at 120–122°F |
| Sous vide | 0°F | Set circulator to 125°F (no carryover) |
The Golden Rule: Always pull your fish 5–10°F below your target temperature and let it rest for 2–3 minutes. The fish will coast to your target during rest. This is the single most effective technique for avoiding overcooked fish.
Where to Insert the Thermometer
- Target the thickest part. Insert the probe into the very center of the thickest section of the fillet. This is the coldest point and the last to reach temperature.
- Go horizontal, not vertical. For thin fillets, insert the probe from the side (horizontally through the thickest edge) rather than straight down through the top. This keeps the tip in the center of the flesh, not pressed against the pan or skin below.
- Avoid bones and skin. Bones conduct heat faster than flesh, so touching a bone gives a falsely high reading. Skin insulates, so reading against skin gives a falsely low reading.
- Check multiple spots. For large fillets or whole fish, check in 2–3 locations. The thickest part near the head cooks slower than the thinner tail section.
Visual and Touch Doneness Cues
A thermometer is the gold standard, but experienced cooks also use visual and tactile cues to confirm doneness:
- The flake test: Gently insert a fork or the tip of a knife into the thickest part and twist slightly. Properly cooked fish will begin to flake apart along its natural grain. If it resists, it needs more time. If it falls apart on its own, it is overdone.
- The press test: Press the center of the fillet with your finger. Rare fish feels soft and springs back slowly. Medium fish feels firm but yields slightly. Well-done fish feels firm and does not yield.
- Color change: Salmon transitions from deep ruby/orange (raw) to lighter pink (medium-rare) to pale pink (medium) to opaque light pink (well done). The transition line is visible from the sides of the fillet as it cooks.
- White albumin appearing: The white protein that beads on the surface of salmon is albumin. A small amount is normal. Large amounts indicate the fish is being cooked at too high a temperature or for too long.
5. Seasoning & Flavor Pairing
Wild fish has a clean, natural flavor that benefits from thoughtful seasoning rather than heavy sauces. The goal is to complement the fish, not mask it. The best pairings follow a simple formula: salt for flavor, acid for brightness, fat for richness, and herbs or spice for complexity.
Herbs That Pair with Each Species
| Species | Best Herbs | Why It Works |
|---|---|---|
| Salmon | Dill, tarragon, chives, thyme | Rich, fatty fish pairs with bright, aromatic herbs that cut through the oil |
| Halibut | Basil, parsley, chervil, mint | Mild, lean flesh showcases gentle herbs without being overpowered |
| Cod | Parsley, cilantro, oregano, rosemary | Neutral flavor absorbs bolder herbs well; handles Mediterranean and Latin profiles |
| Sablefish | Shiso, scallion, ginger, cilantro | Buttery texture is elevated by sharp, aromatic Asian-profile herbs |
Acid Balance: The Secret Weapon
Acid is the most underused element in home seafood cooking. A squeeze of lemon or a splash of vinegar does not just add flavor — it fundamentally transforms the dish by cutting richness, brightening dull flavors, and enhancing the perception of freshness.
- Lemon: The classic. Squeeze fresh lemon juice over finished fish, not during cooking (heat destroys the bright, volatile compounds). Lemon zest, however, can be added during cooking for a deeper citrus note.
- Rice vinegar: Mild and slightly sweet. Perfect for Asian-style glazes and dressings. Will not overpower delicate white fish.
- White wine: Adds both acid and aroma. Ideal for deglazing a pan after searing to build a quick sauce. Use dry wines only — sweet wines caramelize and burn.
- Sherry vinegar: Rich, complex, slightly nutty. Excellent in vinaigrettes drizzled over room-temperature poached fish or in Spanish-inspired preparations.
- Yuzu or lime: Yuzu for Japanese-style dishes, lime for Southeast Asian and Latin preparations. Both pair beautifully with raw or lightly cooked preparations.
Fat Pairings: Richness and Texture
- Butter: Brown butter (beurre noisette) is one of the great finishing sauces for any white fish or salmon. Cook whole butter over medium heat until the milk solids turn golden and nutty, then spoon over the fish with capers and lemon.
- Extra virgin olive oil: Best used as a finishing oil rather than a cooking fat (it burns at searing temperatures). Drizzle over roasted or grilled fish for Mediterranean-style dishes.
- Sesame oil (toasted): A small amount goes a long way. Add a few drops to finished dishes for an intense, nutty aroma that pairs exceptionally well with sablefish and salmon.
- Coconut milk: Provides creamy richness in Thai curries and Indian-style preparations. Full-fat coconut milk poaches fish gently while infusing it with flavor.
- Avocado oil: Neutral flavor with the highest smoke point of any cooking oil (520°F). The best choice for high-heat searing when you want the fish flavor to shine without any oil taste.
Spice Profiles by Cuisine
Japanese
Core flavors: Soy sauce, mirin, sake, miso, ginger, wasabi, sesame
Best for: Salmon, sablefish, cod
Signature technique: Miso-marinated sablefish (marinate 24–48 hours in white miso, mirin, and sake, then broil). Teriyaki glaze for salmon (equal parts soy sauce, mirin, and sake reduced by half with a pinch of sugar).
Mediterranean
Core flavors: Olive oil, lemon, garlic, capers, olives, tomatoes, oregano, fennel
Best for: Halibut, cod, whole fish
Signature technique: En papillote (parchment paper packet) with tomatoes, olives, capers, and white wine. Fish bakes in its own aromatic steam for incredibly moist results.
Cajun / Creole
Core flavors: Paprika, cayenne, garlic powder, onion powder, thyme, oregano, black pepper
Best for: Firm-fleshed fish (halibut, cod, thick salmon steaks)
Signature technique: Blackened fish in a smoking-hot cast iron skillet. Coat the fillet heavily in Cajun spice blend, sear in clarified butter for 2–3 minutes per side until the spice crust is dark and fragrant.
Pacific Northwest
Core flavors: Cedar smoke, juniper, brown sugar, black pepper, thyme, Dijon mustard, maple
Best for: Salmon (especially sockeye and king), halibut
Signature technique: Cedar-planked salmon with a brown sugar and Dijon glaze. The plank smokes gently as the salmon cooks, infusing the flesh with woody, aromatic flavor that is impossible to replicate with any other method.
Salt early, salt generously. Season your fish with fine sea salt at least 15–30 minutes before cooking. This gives the salt time to penetrate the flesh rather than sitting on the surface. The result is better-seasoned fish throughout, not just on the outside. Pat dry again after salting to remove any moisture the salt draws out.
6. Troubleshooting Common Seafood Cooking Problems
Every home cook has experienced at least one of these frustrations. The good news is that each problem has a clear, repeatable solution. Once you understand the science behind what went wrong, you will never make the same mistake twice.
Why It Happens
Raw protein forms chemical bonds with metal when it touches a hot surface. These bonds are temporary — as the protein cooks and firms up, the bonds break and the fish releases on its own. Sticking happens when you try to flip before those bonds have broken, or when the pan was not hot enough to initiate proper searing.
Common Mistakes
Putting fish in a cold or warm (not hot) pan. Using too little oil. Moving the fish too soon after placing it. Cooking skin-side up first instead of skin-side down. Using a pan with scratched or worn non-stick coating.
The Fix: Heat your pan over medium-high for a full 3–4 minutes before adding oil. When the oil shimmers and just barely begins to smoke, place the fish in the pan. Do not touch it for at least 3 minutes. When it is ready, it will release cleanly. If it resists, give it another 30 seconds. Patience is the entire solution.
Why It Happens
Fish has far less connective tissue and fat than red meat or chicken. This means it goes from perfectly done to overdone in a very short window — sometimes just 1–2 minutes. Most home cooks overcook fish because they rely on time instead of temperature, or because they do not account for carryover cooking.
Common Mistakes
Cooking at too high a temperature for too long. Not using a thermometer. Leaving the fish on the heat source while you prepare the plate. Following recipe times exactly without checking actual temperature.
The Fix: Use an instant-read thermometer and pull the fish 5–10°F below your target temperature. Let it rest for 2–3 minutes. The residual heat will bring it to the perfect temperature. For oven cooking, try lowering the temperature by 25°F and checking earlier than the recipe suggests. When in doubt, undercook slightly — you can always put it back in the oven for 30 seconds.
Why It Happens
Fresh fish should smell like the ocean — clean, briny, slightly sweet. A strong "fishy" smell comes from trimethylamine (TMA), a compound that forms as fish degrades. It is a direct indicator that the fish is past its prime freshness. Wild fish that was properly handled and flash-frozen at sea should have virtually no fishy smell when thawed correctly.
Common Mistakes
Buying "fresh" fish that has been sitting in the display case for days. Thawing at room temperature (which accelerates TMA production). Not checking the fish before cooking. Storing thawed fish in the refrigerator for more than 1–2 days.
The Fix: Start with properly handled fish. Flash-frozen wild fish (like Popsie’s) is often fresher than counter fish because it was frozen within hours of harvest. Before refrigerator thawing, open or remove the vacuum packaging, place the fish in a shallow covered container, and keep it refrigerated. Never thaw on the counter. If you detect a mild fishy note, rinse the fish briefly under cold water and pat dry. A quick soak in milk (15 minutes) or a light sprinkle of lemon juice also neutralizes TMA. If the fish smells strongly of ammonia, discard it.
Why It Happens
Crispy fish skin requires two things: dry surface and sustained high heat. Water is the enemy of crispiness. Any moisture on the skin will create steam instead of the Maillard reaction (browning), leaving you with rubbery, chewy skin instead of shatteringly crisp skin.
Common Mistakes
Not drying the skin before cooking. Starting with a pan that is not hot enough. Moving the fish around during cooking (breaking the skin contact with the pan). Cooking skin-side up instead of skin-side down first.
The Fix: Pat the skin bone-dry with paper towels. For extra crispiness, leave the fillet uncovered in the refrigerator for 30 minutes to an hour before cooking — the dry fridge air desiccates the surface. Score the skin lightly in a crosshatch pattern if it tends to curl. Place skin-side down in a hot, oiled pan and press the fillet flat with your spatula for the first 20 seconds. Then leave it alone for 3–4 minutes. The skin should be golden and crisp when you flip.
Why It Happens
Fish fillets are naturally tapered — thick at the head end and thin at the tail. A piece that varies from one inch thick to half an inch thick will cook at dramatically different rates. The thin end will be overdone before the thick end is finished.
Common Mistakes
Cooking a whole fillet without portioning. Not tucking thin tail ends. Starting with cold-from-the-refrigerator fish. Using a hot spot on the stove or an uneven baking sheet.
The Fix: Portion fillets so that all pieces are the same thickness. For uncut fillets, fold the thin tail section under itself to match the thickness of the thicker parts. Let fish come to room temperature for 15–20 minutes before cooking. On a sheet pan, position thicker portions toward the edges (where ovens run hotter) and thinner portions in the center.
Why It Happens
The white substance is albumin, a water-soluble protein that is squeezed out of the muscle fibers as they contract during cooking. It coagulates on the surface and turns white. Every piece of salmon has albumin — it is completely safe to eat. The amount that appears on the surface is directly related to how much the muscle fibers contracted, which means higher heat produces more albumin.
Common Mistakes
Cooking at too high a temperature. Starting with cold fish (the temperature shock causes rapid contraction). Not brining before cooking.
The Fix: A quick brine is the most effective solution. Dissolve one tablespoon of salt in one cup of water. Soak the salmon fillets for 15–20 minutes, then pat dry. The brine dissolves surface albumin and slows the rate at which remaining albumin is expelled during cooking. Additionally, cook at a more moderate temperature (375°F in the oven rather than 450°F, or medium heat rather than high on the stove). Some albumin is inevitable — it is a sign of fresh, quality fish.
Why It Happens
Fish skin shrinks faster than the flesh when it hits a hot surface. Since the skin is on one side, the contraction pulls the edges upward, bowing the fillet into a dome. The center lifts off the pan, cooking unevenly, and the edges get overcooked while the center stays raw.
Common Mistakes
Dropping a skin-on fillet straight into a hot pan without any preparation. Not scoring the skin. Using extremely high heat.
The Fix: Score the skin. Using a sharp knife, make 3–4 shallow cuts through the skin (not into the flesh) perpendicular to the length of the fillet. These cuts allow the skin to expand and contract without pulling the fillet into a curl. Alternatively, press the fillet flat with a spatula for the first 15–20 seconds of cooking. Once the skin sets, it will stay flat on its own.
Why It Happens
Many home cooks under-season fish out of fear of overpowering the delicate flavor. While restraint is good, fish actually requires more salt per ounce than red meat because much of the salt washes away or stays on the surface without penetrating the flesh. The result: a perfectly cooked but disappointingly bland piece of fish.
Common Mistakes
Adding salt right before cooking (no time to penetrate). Using too little salt. Forgetting acid (lemon, vinegar). Skipping the finishing step of salt, fat, and acid at the end.
The Fix: Season with fine sea salt 15–30 minutes before cooking, using about 3/4 teaspoon per pound of fish. The salt will draw out a small amount of moisture, then be reabsorbed into the flesh along with the flavor. Pat dry before cooking. After cooking, finish with a squeeze of lemon juice, a pinch of flaky finishing salt (like Maldon), and a drizzle of good olive oil or brown butter. This three-step finish — acid, salt, fat — elevates any piece of fish.
The best troubleshooting tool is a notebook. After each time you cook fish, jot down what you did, what worked, and what did not. Include the species, thickness, cooking method, temperature, and time. Within a few sessions, you will have a personalized reference that is more accurate than any recipe.
7. Food Safety Essentials
Safe handling is the foundation of good seafood cooking. Properly handled fish is not only safer to eat — it tastes better because it has not been exposed to conditions that accelerate degradation. These guidelines apply to all seafood, whether fresh, frozen, or previously frozen.
Proper Thawing Methods
How you thaw frozen fish directly affects its texture, flavor, and safety. Improper thawing is one of the most common causes of mushy texture and off-flavors. There are three safe methods, listed in order of recommendation:
Method 1: Refrigerator Thawing (Best Quality)
How: Open or remove the vacuum packaging before refrigerator thawing. Place the fish in a shallow covered container, keep it refrigerated, and follow any package or processor instructions.
Why it is best: Slow, even thawing preserves cell structure. The fish stays below 40°F throughout the process, so bacteria never have a chance to multiply. Texture and moisture retention are superior to all other methods.
Method 2: Cold Water Thawing (Fastest Safe Method)
How: Place the sealed fish in a bowl of cold water (below 70°F). Change the water every 30 minutes. Most fillets thaw in 1–2 hours.
Why it works: Water conducts heat much faster than air, so this method is significantly faster than the refrigerator. Keeping the water cold and changing it frequently prevents the outer layer from warming into the bacterial danger zone while the center is still frozen.
Method 3: Cook From Frozen
How: Many cooking methods work beautifully with frozen fish. Oven roasting, poaching, and steaming are all excellent options. Add approximately 50% more cooking time than you would for thawed fish.
Why it works: The USDA confirms that cooking fish from frozen is safe. For a complete guide to techniques and times, see our dedicated guide: How to Cook Fish From Frozen.
Never thaw fish at room temperature, in warm water, or in the microwave. Room temperature thawing lets the outer layer sit in the bacterial danger zone (40–140°F) while the inside is still frozen. Warm water accelerates this problem. Microwave thawing creates hot spots that partially cook the fish, ruining texture. All three methods produce inferior results and increase food safety risk.
Cross-Contamination Prevention
Raw seafood can carry harmful bacteria just like raw poultry. Simple habits prevent cross-contamination:
- Use separate cutting boards. Keep a dedicated board for raw fish. Color-coded boards make this easy — blue for fish is the industry standard.
- Wash hands for 20 seconds with soap and warm water after handling raw fish, before touching anything else in the kitchen.
- Clean surfaces immediately. Wipe down counters, knives, and boards with hot soapy water after preparing raw fish. Follow with a food-safe sanitizer or a diluted bleach solution (1 tablespoon per gallon of water).
- Store raw fish below cooked foods in the refrigerator. If raw fish drips onto cooked food or vegetables below, it contaminates them. Always place raw proteins on the lowest shelf.
- Never reuse marinades. If you marinated raw fish in a sauce, do not use that same sauce as a topping or finishing glaze unless you bring it to a full rolling boil for at least one minute first.
Storage Times: Fresh, Frozen, and Cooked
| Fish State | Refrigerator (40°F) | Freezer (0°F) | Notes |
|---|---|---|---|
| Fresh (never frozen) | 1–2 days | 4–6 months | Cook or freeze as soon as possible after purchase |
| Thawed from frozen | 1–2 days | Do not refreeze | Cook within 24 hours for best quality |
| Flash-frozen (vacuum sealed) | N/A — keep frozen | 12+ months | Popsie fish is flash-frozen at peak freshness; quality maintained for 12 months |
| Cooked fish | 3–4 days | 2–3 months | Cool to room temp within 2 hours, then refrigerate promptly |
| Smoked fish (opened) | 5–7 days | 2–3 months | Keep tightly wrapped; commercial smoked fish lasts longer than home-smoked |
When to Discard: Visual and Smell Indicators
Trust your senses. Fish communicates its freshness clearly through sight, smell, and touch. Here is what to watch for:
- Smell: Fresh fish smells like clean ocean water. A mild, briny scent is normal. A strong "fishy" odor, ammonia smell, or sour note means the fish has gone bad. When in doubt, discard it.
- Texture: Fresh fish flesh is firm and springs back when pressed. If the flesh stays indented, feels slimy, or is mushy, it has degraded past the point of safe consumption.
- Color: Look for vibrant, natural color. Salmon should be rich orange-red to pink. Halibut and cod should be white to translucent. Any browning, yellowing at the edges, or grayish discoloration is a sign of oxidation and age.
- Surface: A light sheen of moisture is normal. A thick, opaque, or milky slime on the surface is a sign of bacterial growth. Wipe the surface — if the slime returns or the smell worsens, discard the fish.
- Freezer burn: Dry, white, papery patches on frozen fish indicate freezer burn. It is not unsafe, but the affected areas will be dry and flavorless. Trim away freezer-burned sections before cooking; the remaining fish is fine to eat.
The "When in Doubt" Rule: If you are unsure whether fish is still safe, discard it. Foodborne illness from spoiled seafood is unpleasant at best and dangerous at worst. A single piece of fish is never worth the risk. Starting with flash-frozen, vacuum-sealed fish from a trusted source like Popsie eliminates most of this uncertainty from the start.
8. Quick-Reference Cooking Charts
Print these charts or bookmark this page. They give you the temperature, time, and technique for every major species and cooking method combination you are likely to use at home.
Cooking Method × Species Matrix
All times assume a 1-inch thick fillet at refrigerator temperature. Adjust by adding 2–3 minutes per additional half-inch of thickness. Always verify doneness with an instant-read thermometer.
| Species | Pan Sear | Oven Roast (425°F) | Grill (Direct) | Poach / Steam | Broil |
|---|---|---|---|---|---|
| Sockeye Salmon | 3–4 min per side | 10–12 min | 3–4 min per side | 8–10 min | 6–8 min |
| King Salmon | 4–5 min per side | 12–14 min | 4–5 min per side | 10–12 min | 8–10 min |
| Coho Salmon | 3–4 min per side | 10–12 min | 3–4 min per side | 8–10 min | 6–8 min |
| Pink Salmon | 2–3 min per side | 8–10 min | 3 min per side | 6–8 min | 5–7 min |
| Halibut | 4–5 min per side | 12–15 min | 4–5 min per side | 10–12 min | 8–10 min |
| Pacific Cod | 3–4 min per side | 10–12 min | 3–4 min per side | 8–10 min | 6–8 min |
| Sablefish | 3–4 min per side | 10–14 min | 3–4 min per side | 8–10 min | 6–8 min |
Target Temperature Quick Reference
| Species | Rare / Medium-Rare | Medium | Well Done (FDA) | Pull Temp (for medium-rare with carryover) |
|---|---|---|---|---|
| Salmon (all species) | 120–125°F | 130–135°F | 145°F | 115–118°F |
| Halibut | 125–130°F | 130–135°F | 145°F | 120–125°F |
| Pacific Cod | N/A | 135–140°F | 145°F | 130–135°F |
| Sablefish | 120–125°F | 125–130°F | 145°F | 115–120°F |
Serving Size Guide
| Cut | Per Person (dinner) | Per Person (appetizer) | Planning Note |
|---|---|---|---|
| Boneless fillets | 6–8 oz raw | 3–4 oz raw | Fish loses ~15% weight during cooking |
| Steaks (bone-in) | 8–10 oz raw | 4–5 oz raw | Account for bone weight (~20% of total) |
| Whole fish | 12–16 oz raw | 6–8 oz raw | Yield is ~50% after bones, head, and skin |
| Smoked fish | 3–4 oz | 1.5–2 oz | Smoked fish is denser; smaller portions satisfy |
9. Building Your Seafood Pantry
A well-stocked pantry turns a simple piece of fish into a complete, flavorful meal in 20 minutes. Keep these ingredients on hand and you will always be ready to cook wild fish with confidence.
Oils & Fats
- Avocado oil (high-heat searing)
- Extra virgin olive oil (finishing)
- Unsalted butter (brown butter, basting)
- Toasted sesame oil (Asian dishes)
- Coconut oil (curry-based recipes)
Acids & Vinegars
- Fresh lemons (always have 2–3)
- Fresh limes
- Rice vinegar (mild, for Asian dishes)
- White wine vinegar
- Sherry vinegar
Salts & Seasonings
- Fine sea salt (cooking)
- Flaky finishing salt (Maldon)
- Freshly ground black pepper
- Smoked paprika
- Garlic powder & onion powder
Sauces & Condiments
- Soy sauce or tamari
- Dijon mustard
- Capers (salt-packed preferred)
- Fish sauce (Thai or Vietnamese)
- Miso paste (white and red)
Aromatics & Herbs
- Fresh garlic
- Fresh ginger root
- Fresh dill (grows easily in pots)
- Flat-leaf parsley
- Scallions / green onions
Dry Goods
- Panko breadcrumbs (for crusted fish)
- All-purpose flour (dredging)
- Cornstarch (light batters, thickening)
- Sesame seeds (black and white)
- Brown sugar (glazes)
The Freezer Strategy: Always Be Ready
The best seafood pantry includes your freezer. With flash-frozen wild fish on hand, you are always 20–30 minutes away from a restaurant-quality dinner. Here is how to build your freezer stock:
- Keep 3–4 species in rotation. Variety prevents boredom. A good starting lineup: sockeye salmon for weeknight searing, halibut for weekend dinners, cod for fish tacos and lighter meals, and sablefish for special occasions.
- Store in single-serving portions. Vacuum-sealed individual portions (like Popsie ships) let you thaw exactly what you need without exposing the rest to air. Never thaw and refreeze.
- Label with the date. Even flash-frozen fish has a window of peak quality. Use within 12 months for the best flavor and texture. Rotate stock so older packages get used first.
- Popsie’s box-size options are designed for this strategy. Review the current product-page choices and live prices to select the variety and quantity that fit your freezer.
The 5-minute sauce formula: While your fish cooks, combine 2 tablespoons of fat (butter or olive oil) + 1 tablespoon of acid (lemon juice or vinegar) + 1 teaspoon of flavor (capers, mustard, miso, or soy sauce) + fresh herbs. Warm gently and spoon over the finished fish. This formula works with any combination and takes less time than the fish itself.
10. Frequently Asked Questions
Technique-Focused Recipes
Each recipe below is designed to practice a specific technique from this guide. Master these six dishes and you will have the core skills to cook any wild fish beautifully.
Perfect Pan-Seared Sockeye Salmon
The foundational technique. Hot-pan method, the 80/20 flip rule, and pulling at the right temperature. Finish with lemon and flaky salt.
Key skill: Judging doneness by thermometer and understanding when the fillet releases naturally.
Oven-Roasted Halibut with Herb Crust
Dijon-panko-herb crusted halibut at 425°F on a parchment-lined sheet pan. Practices even portioning and carryover cooking with lean fish.
Key skill: Managing carryover with delicate halibut. Pull at 125°F and trust the coast to 130–135°F.
Miso-Glazed Sablefish
Sablefish marinated in white miso, mirin, and sake for 24–48 hours, then broiled until the glaze caramelizes. Japanese flavor profile in action.
Key skill: Building flavor through time (marination) and understanding how glaze sugars caramelize under a broiler.
Blackened Cod Tacos
Pacific cod in Cajun spice, seared in smoking-hot cast iron with clarified butter. Served in warm tortillas with lime-cilantro slaw.
Key skill: Managing very high heat in cast iron. Knowing the difference between blackened (controlled char) and burned.
Cedar-Planked Salmon
Salmon on a soaked cedar plank with brown sugar-Dijon glaze, grilled over indirect heat. The plank smolders, infusing aromatic smoke. Works beautifully with sockeye or any thick salmon fillet.
Key skill: Indirect heat management on a grill and using the plank as both cooking surface and flavor source.
Poached Coho in Court-Bouillon
Coho poached in white wine, lemon, bay leaf, peppercorns, and fennel. Served with a caper-parsley vinaigrette.
Key skill: Maintaining poaching liquid at 160–180°F (gentle simmer, no bubbles) to preserve moisture.
Ready to Put These Skills to Work?
Start with the best ingredient: wild Alaskan fish, flash-frozen within hours of harvest and delivered to your door. Choose your species, pick your quantity, and cook with confidence.
This guide is for informational purposes only and does not constitute medical or food safety advice. The FDA recommends cooking all fish to an internal temperature of 145°F. Individuals who are pregnant, immunocompromised, elderly, or under 5 years old should follow FDA guidelines. Always use your best judgment regarding food freshness and safety.